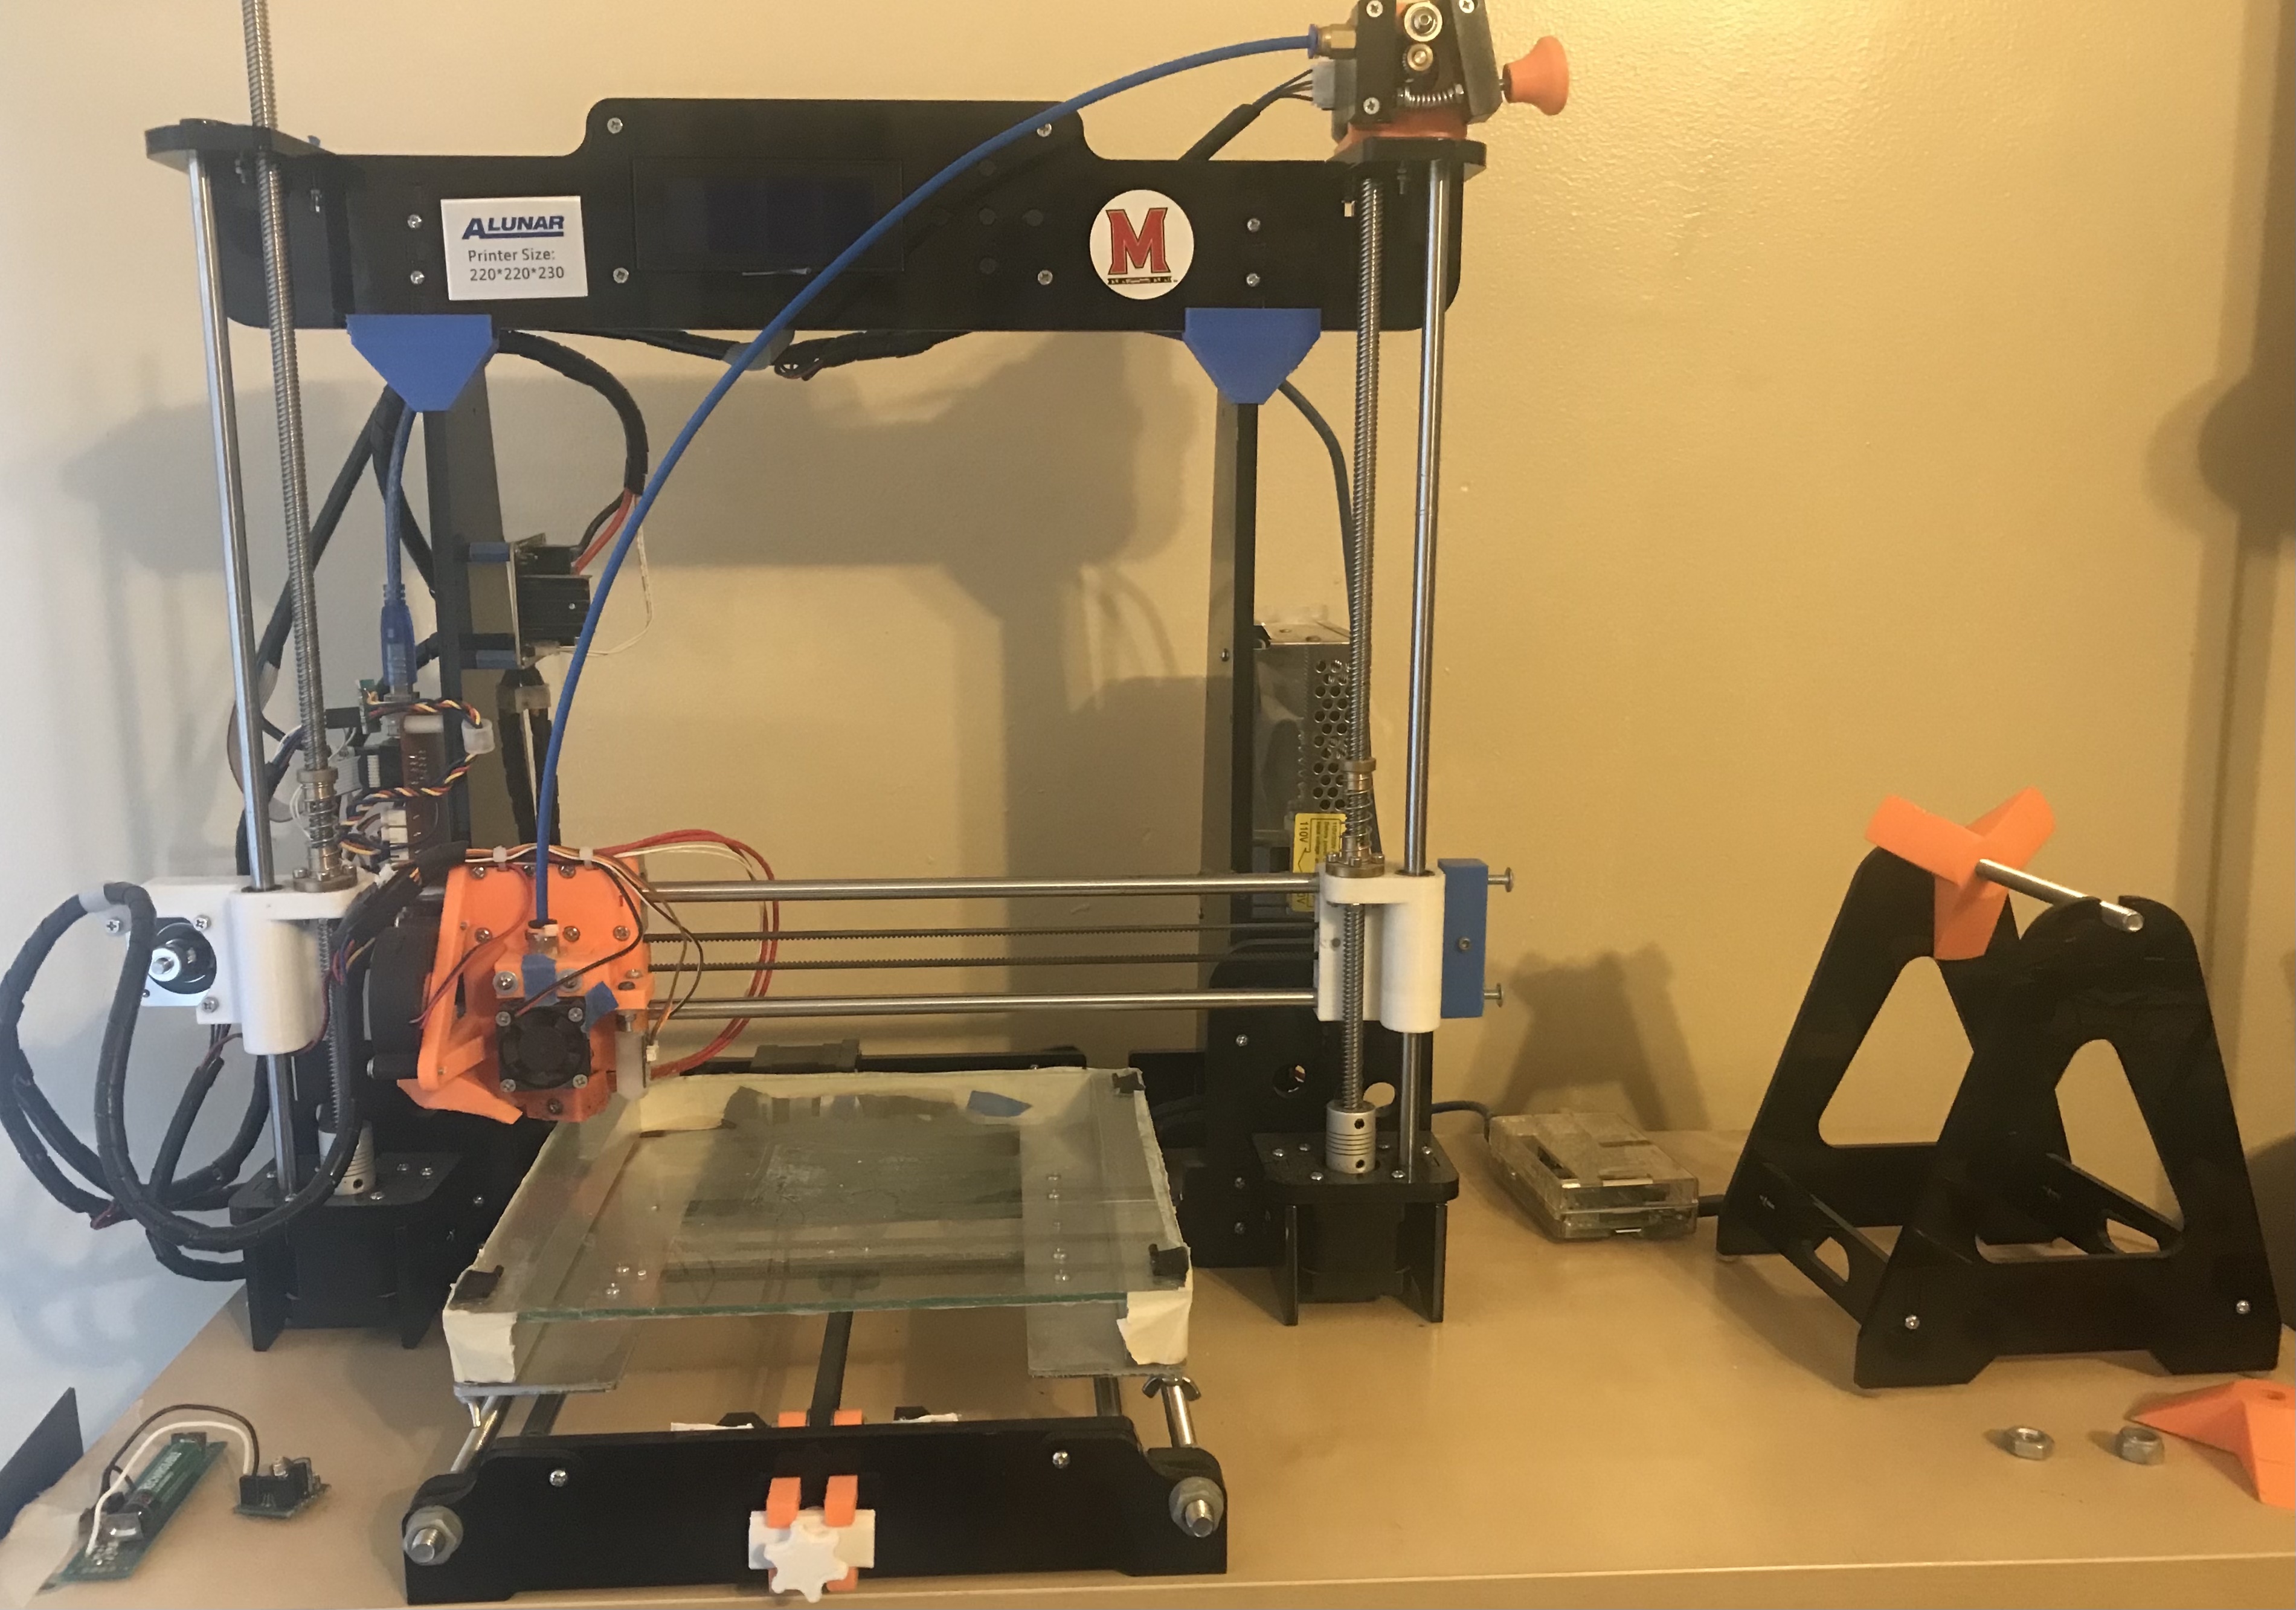
I bought a cheap i3 clone and have spent an inordinate amount of time building and rebuilding it, implementing various upgrades.
Visible here (use “View Image” to see the higher resolution version) are the following modifications that i have made:
In addition i created an adaptor board for the completely non-standard ISP header to the usual 10pin layout, reworked or bypassed many of the connector blocks (especially the high-current ones) and spent what feels to be a lifetime wrapping and routing cables.
To design objects, i enjoy using Constructive Solid Geometry as implemented by OpenSCAD.
Here are some of my combined electronics and 3D printing endeavours. To see larger versions of the images use your browser to “View Image” – they should all be fairly high resolution.
I spend enough time at my computers that it only makes sense to ensure that the input devices i use are comfortable and suitable. It's great fun to think about how we might improve interaction, and i enjoy in particular thinking about keyboards.
To date i have built three, all of which run the excellent Quantum Mechanical Keyboard firmware. This firmware makes it possible to throw together some switches, diodes, and a microcontroller and create a USB human input device capable of all sorts of strange and wonderful things.
This was the first keyboard i built, and i used (most of) an original Atreus keyboard kit. Custom here is the case, which i had laser cut from black acrylic, as well as the 3D printed keycaps in translucent clear-white PET-G.
I assembled this before i had a 3D printer (and used different keycaps), and before the explosion of the custom ergo mechanical keyboard hobby, so it felt very avant garde at the time. I used it happily for many years, but eventually the very narrow hand position began to take a toll on my wrists.

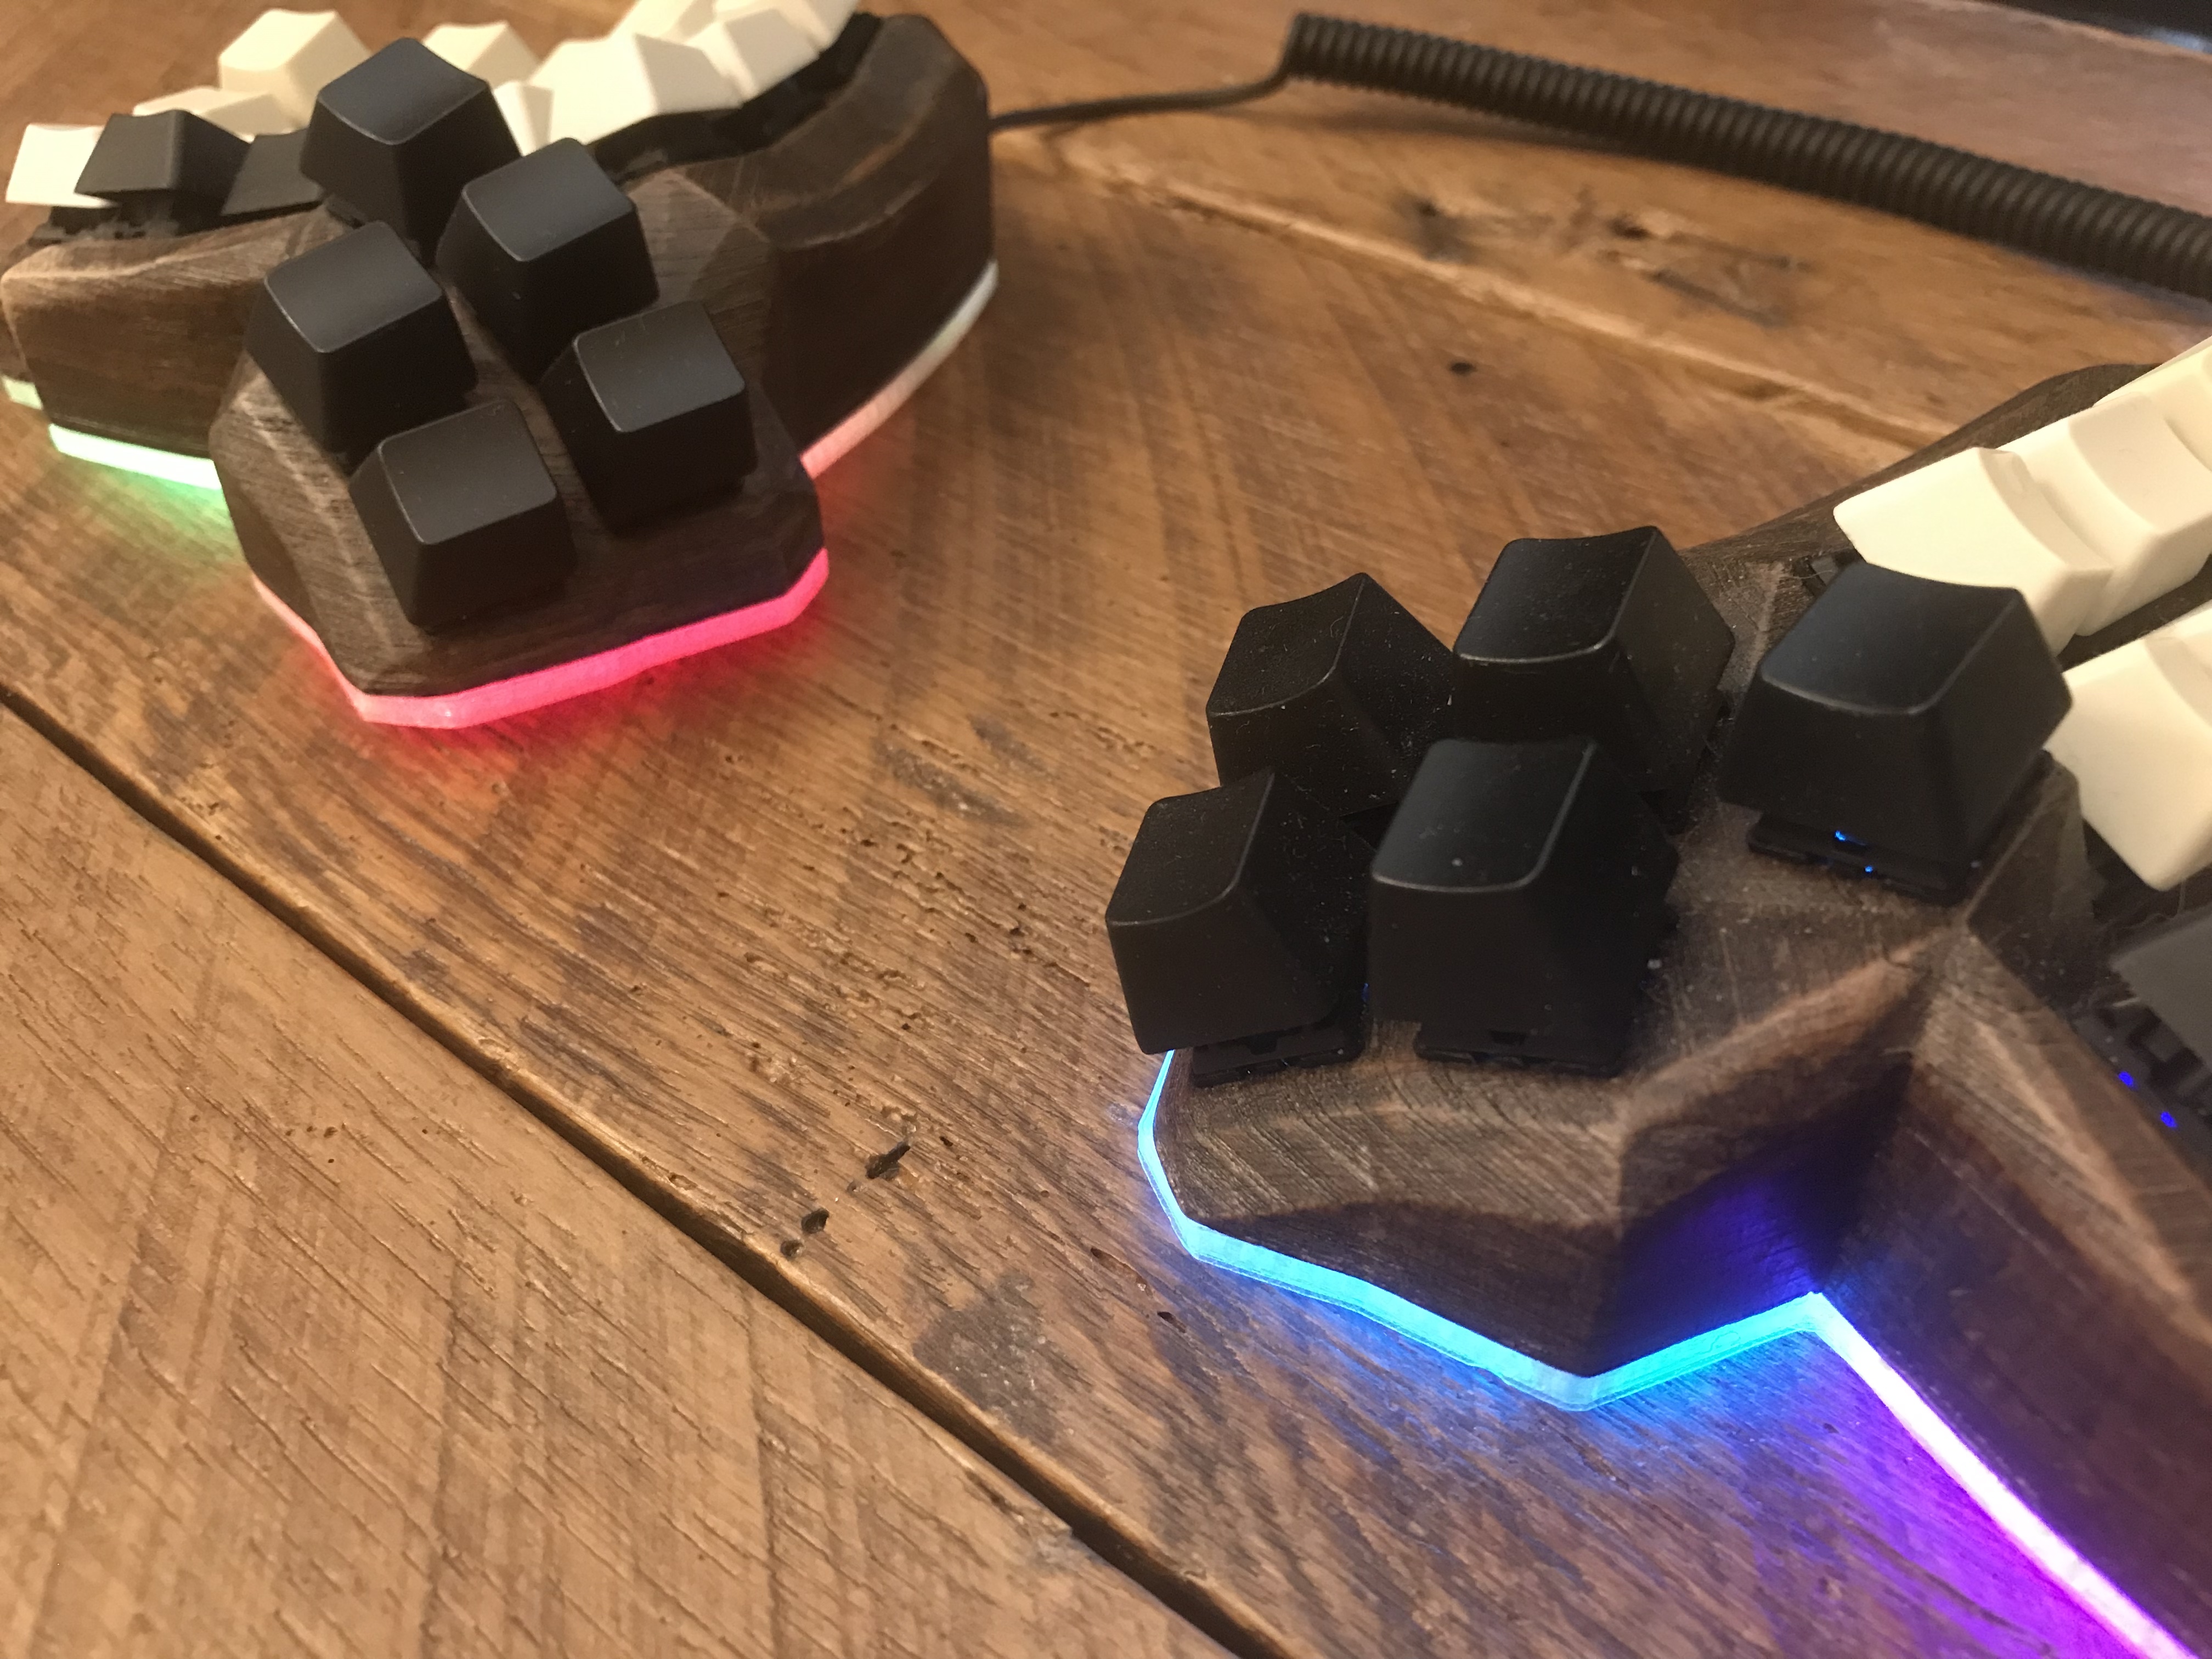
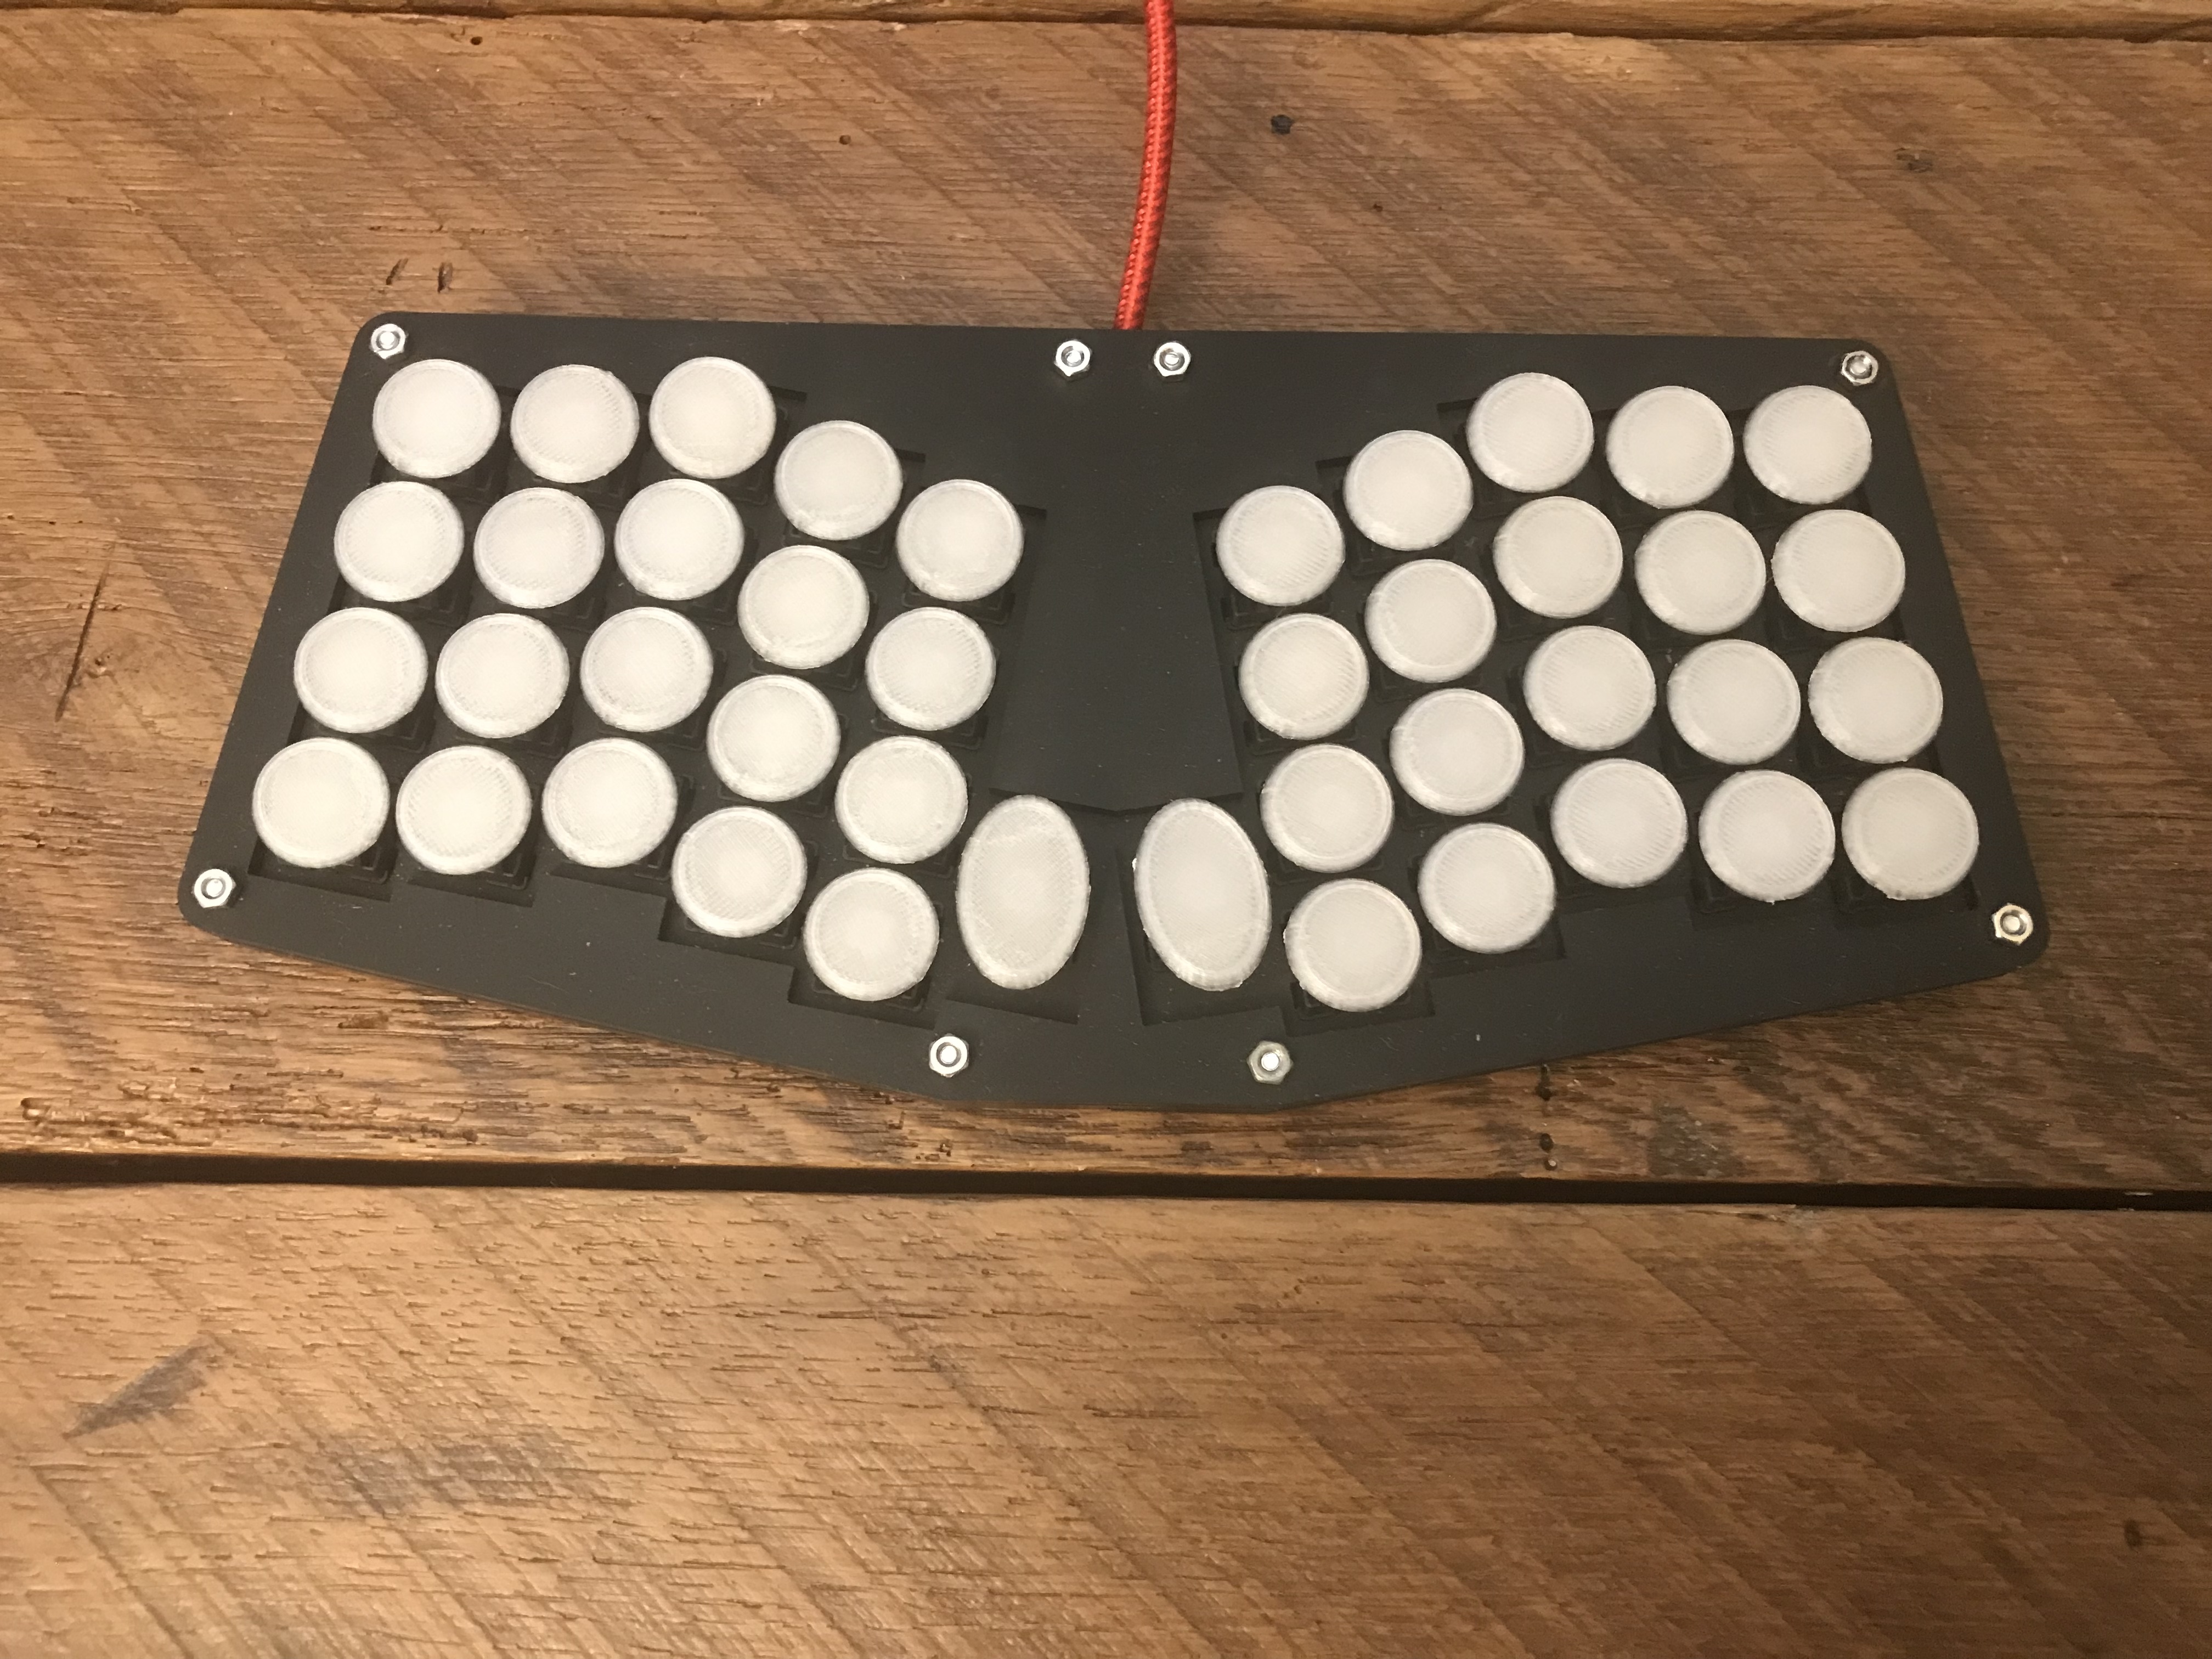
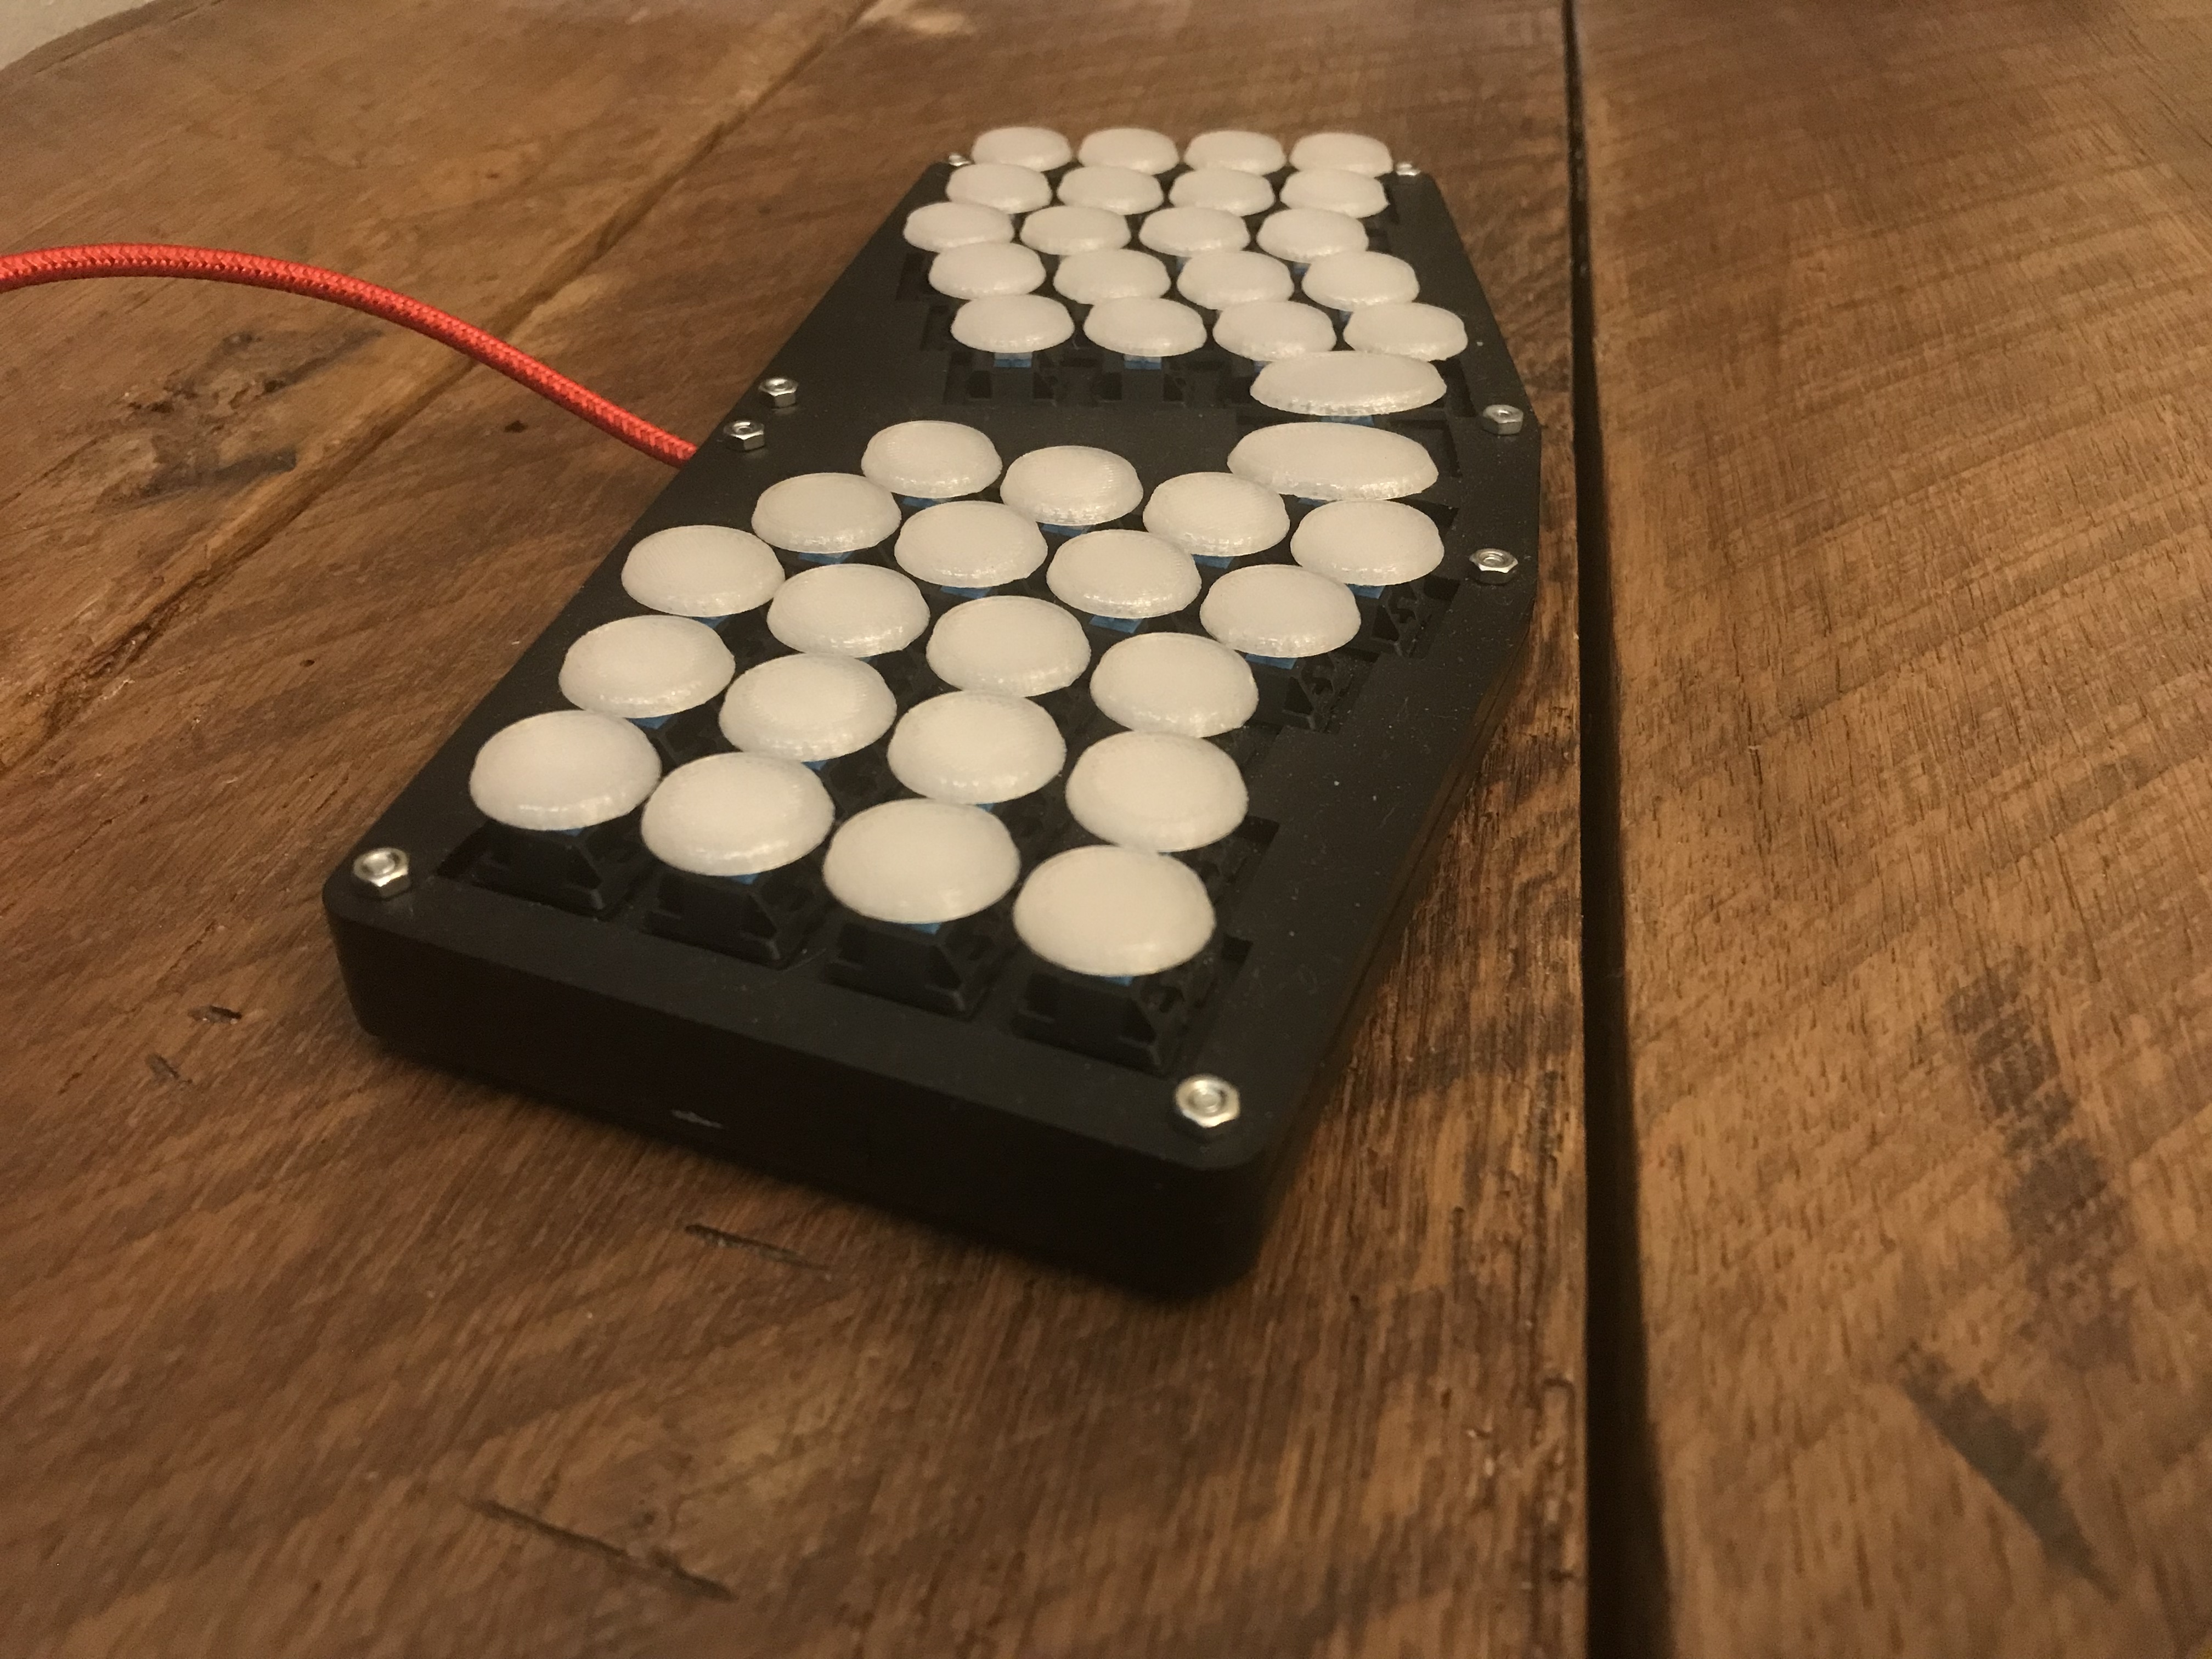
The most visually striking keyboard i've built, this variant of the dactyl-manuform-mini keyboard took me around 50 hours to complete. It is printed in wood grain PLA, which was then sanded and stained several times to give a rather convincing wood impression.
The keyboard has 44 Cherry MX blue switches, hand-wired in each half to an arduino pro micro (clone), and the two halves communicate over 3.5mm TRS. Of course i couldn't resist addressable RGB lights, and so i printed a translucent white-clear PET-G base to showcase the three LEDs per half. The keycaps are a set of OEM profile blanks i had left over from a custom WASD keyboard.

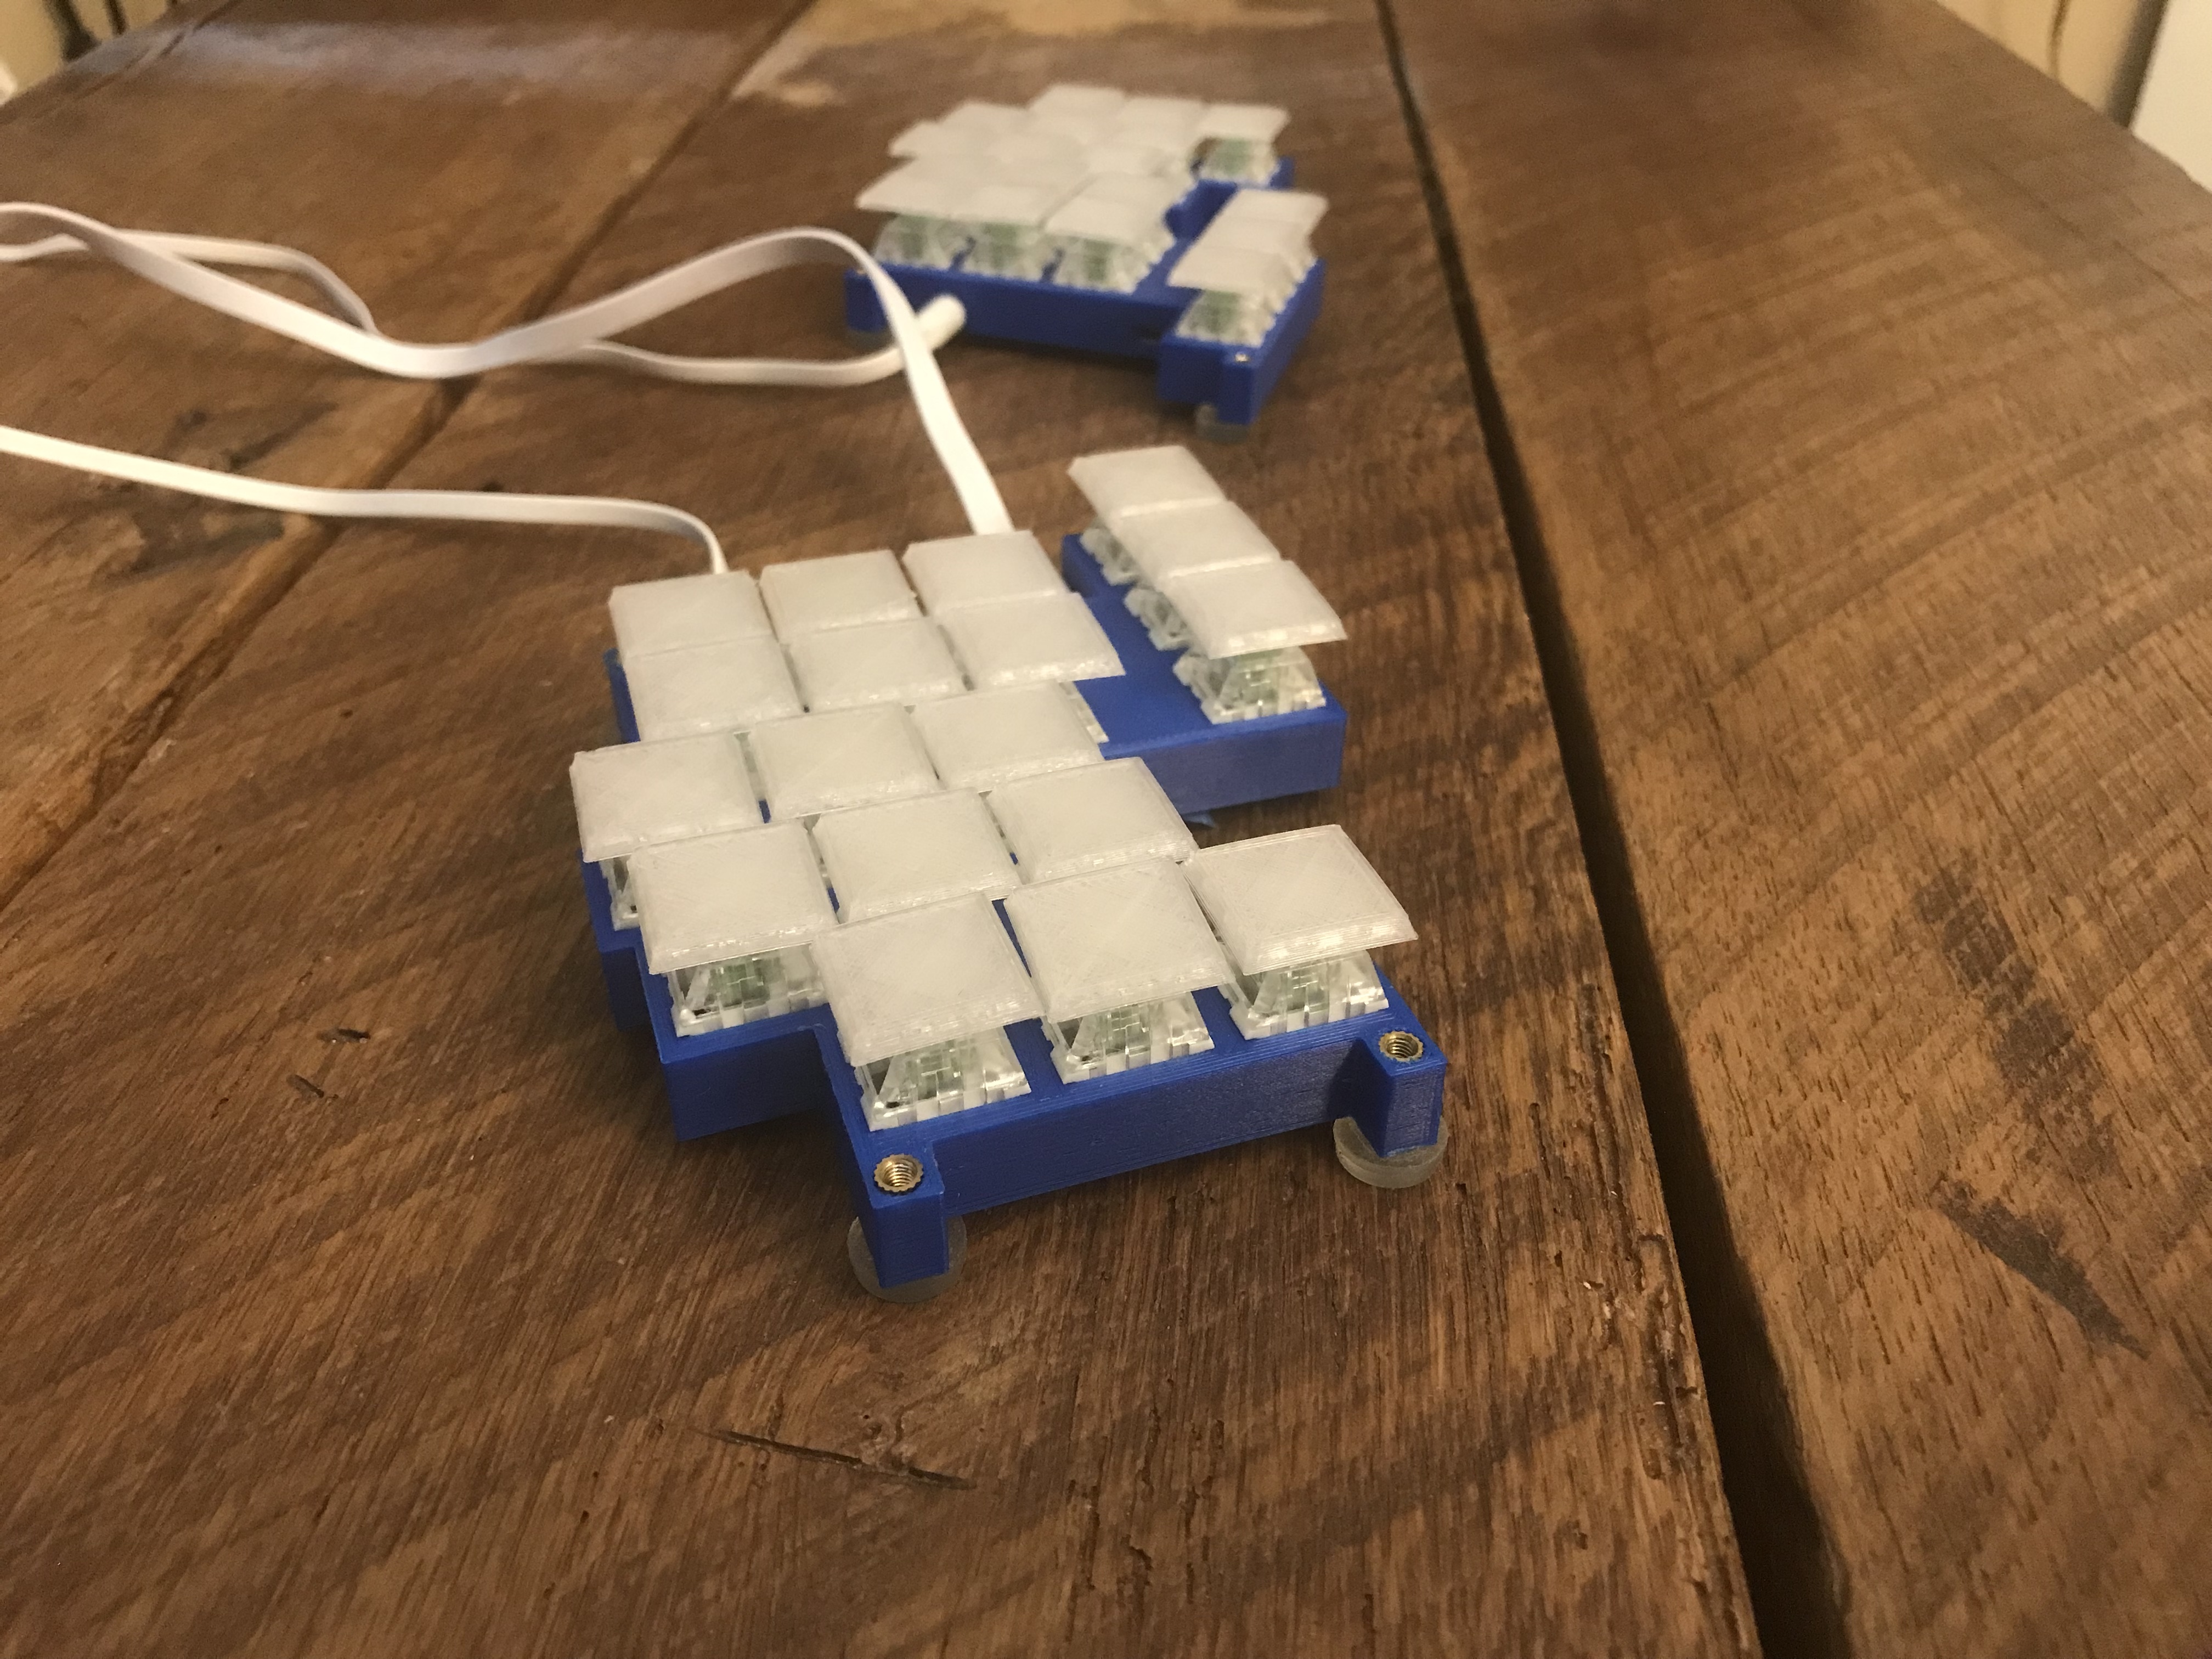
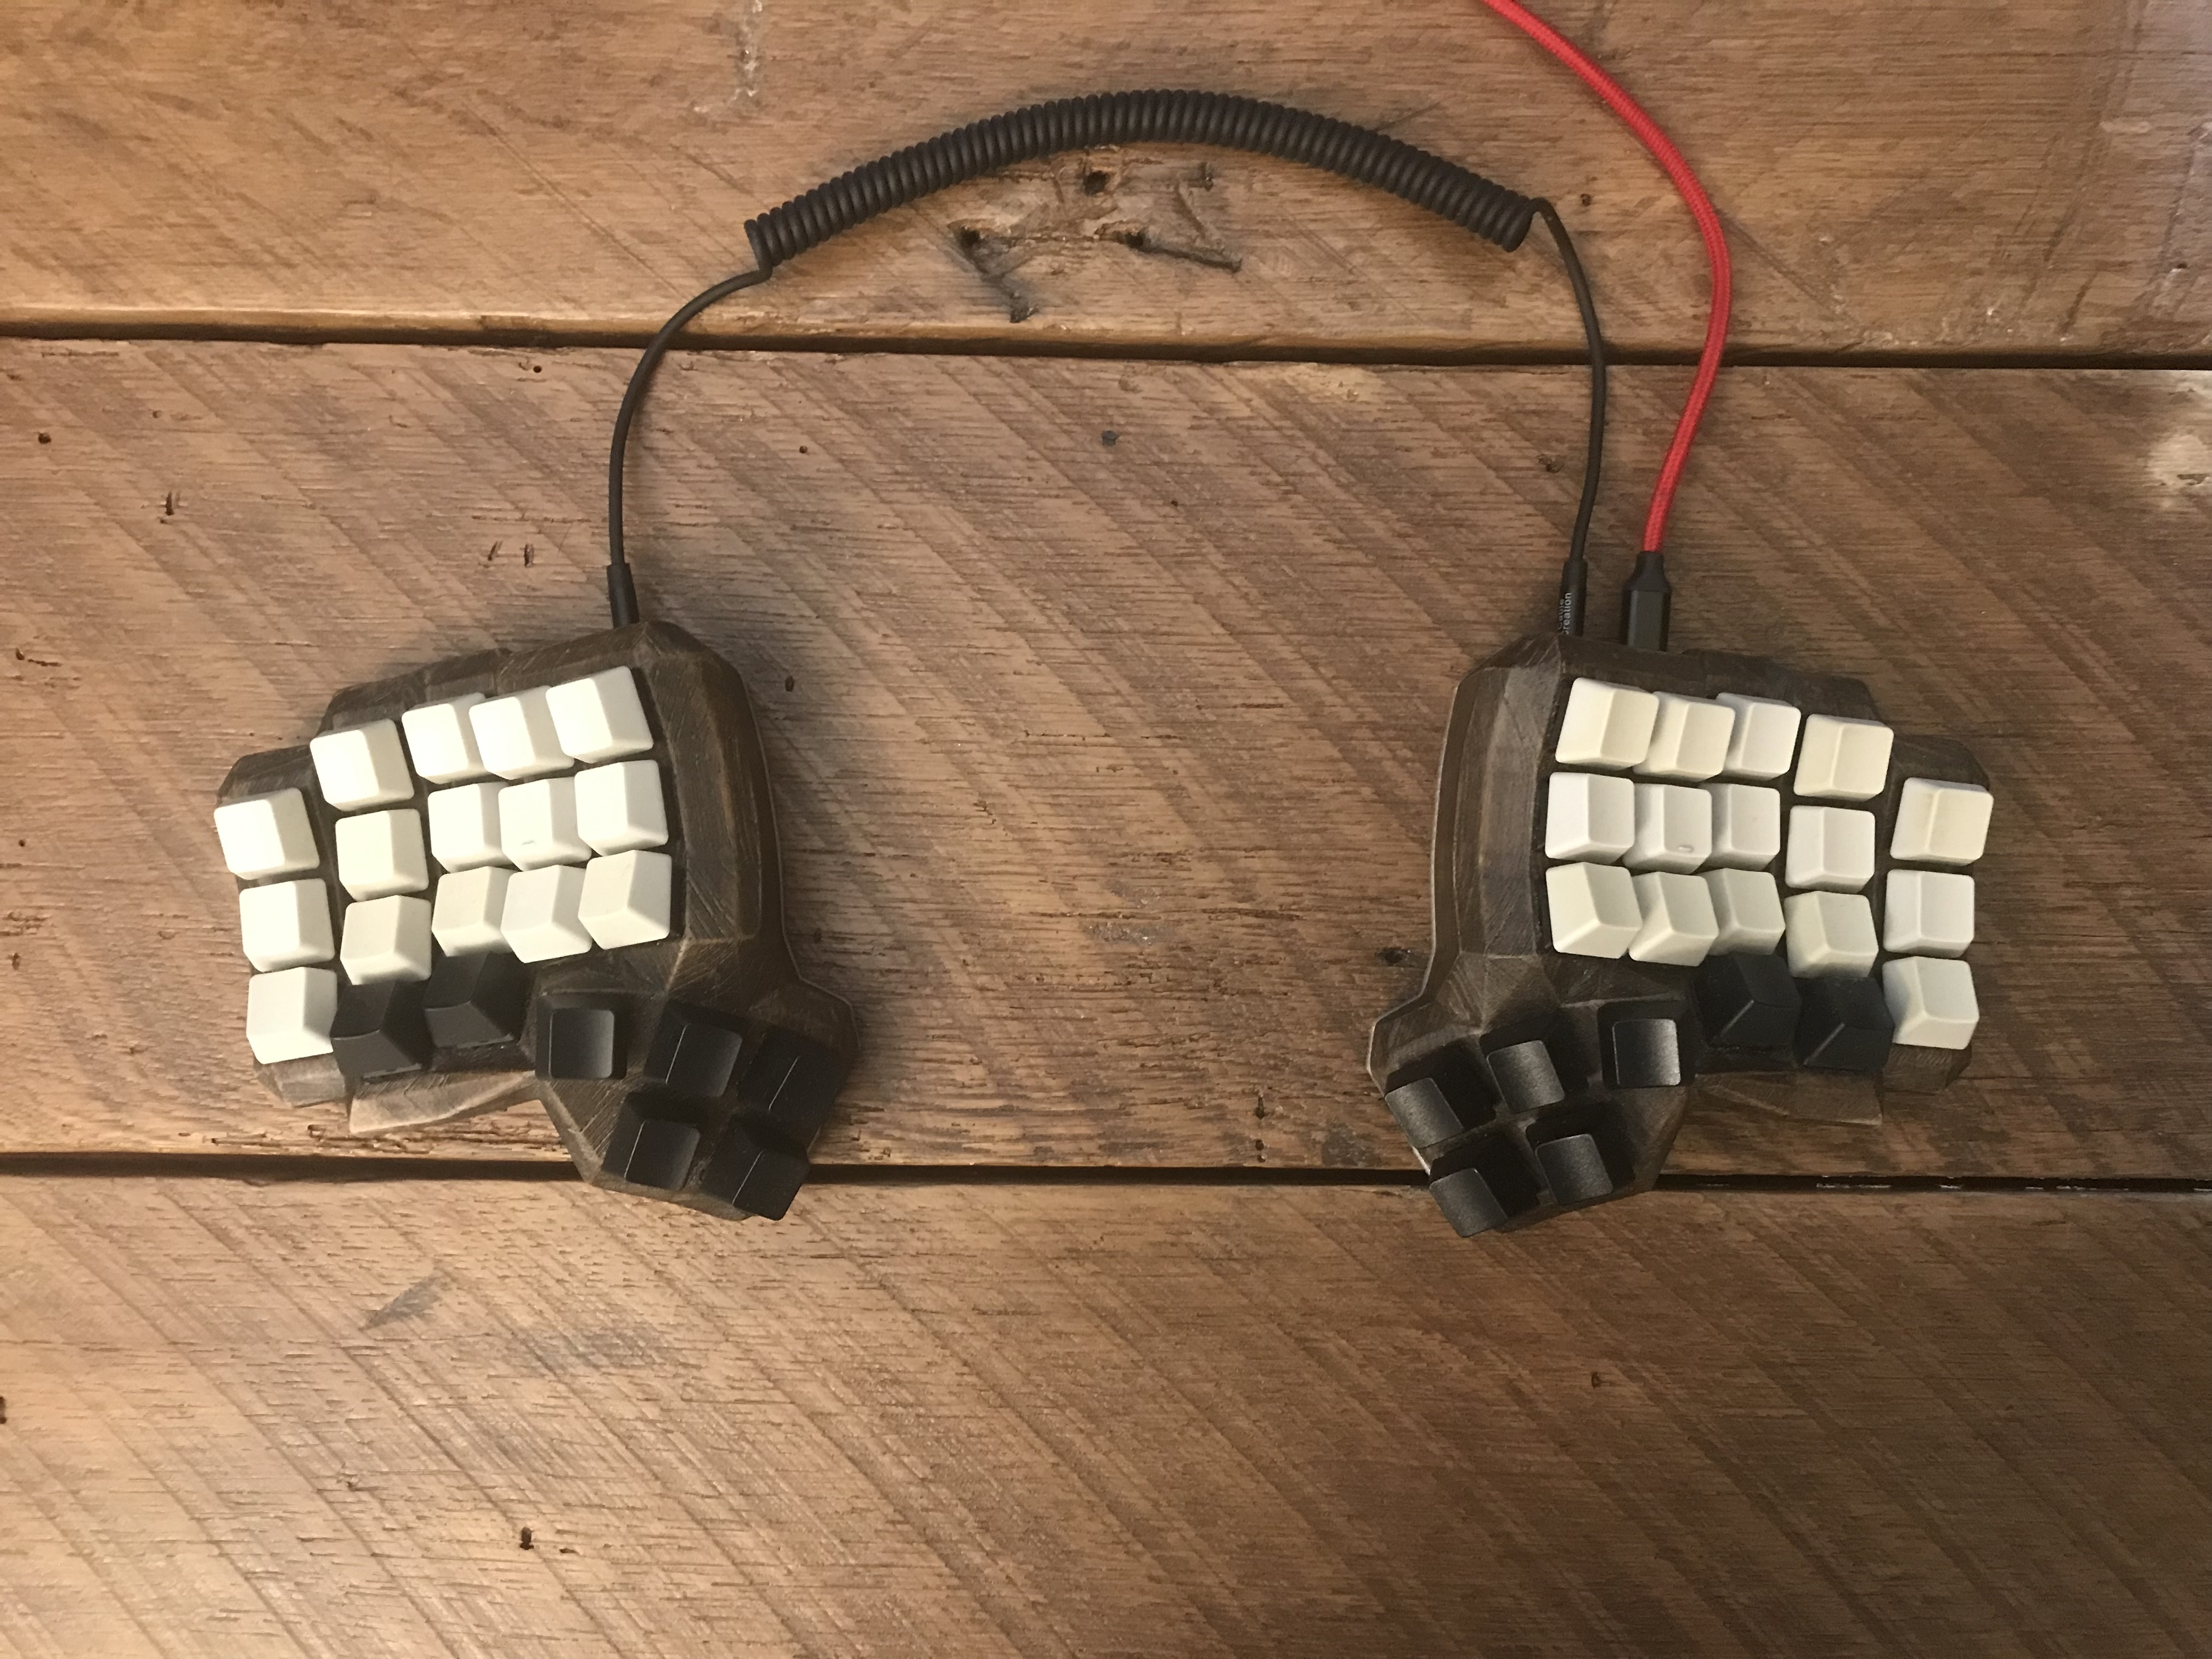
The Dactyl above had too many keys, and the Atreus before it was not split, so i took it upon myself to design a completely custom keyboard to fit my hands precisely. The result of this is the FPKB, so named because i used paint on my finger‐tips to stain paper so that i could obtain various dimensions.
The keyboard is entirely 3D printed, with the frame in blue PLA and the keycaps in translucent white-clear PET-G, and i designed all the parts in OpenSCAD. New for me in this keyboard are the Kailh Box Jade switches (♥!), and the reduced key count: only 36 keys. The layout is inspired by miryoku, although various layers are altered to better suite my muscle memory.
Each half has four M3 threaded inserts, and the intention was that these would receive machine bolts which could be turned to adjust the tenting of the halves. As it turns out, however, i find the keyboard comfortable enough to use without tenting.
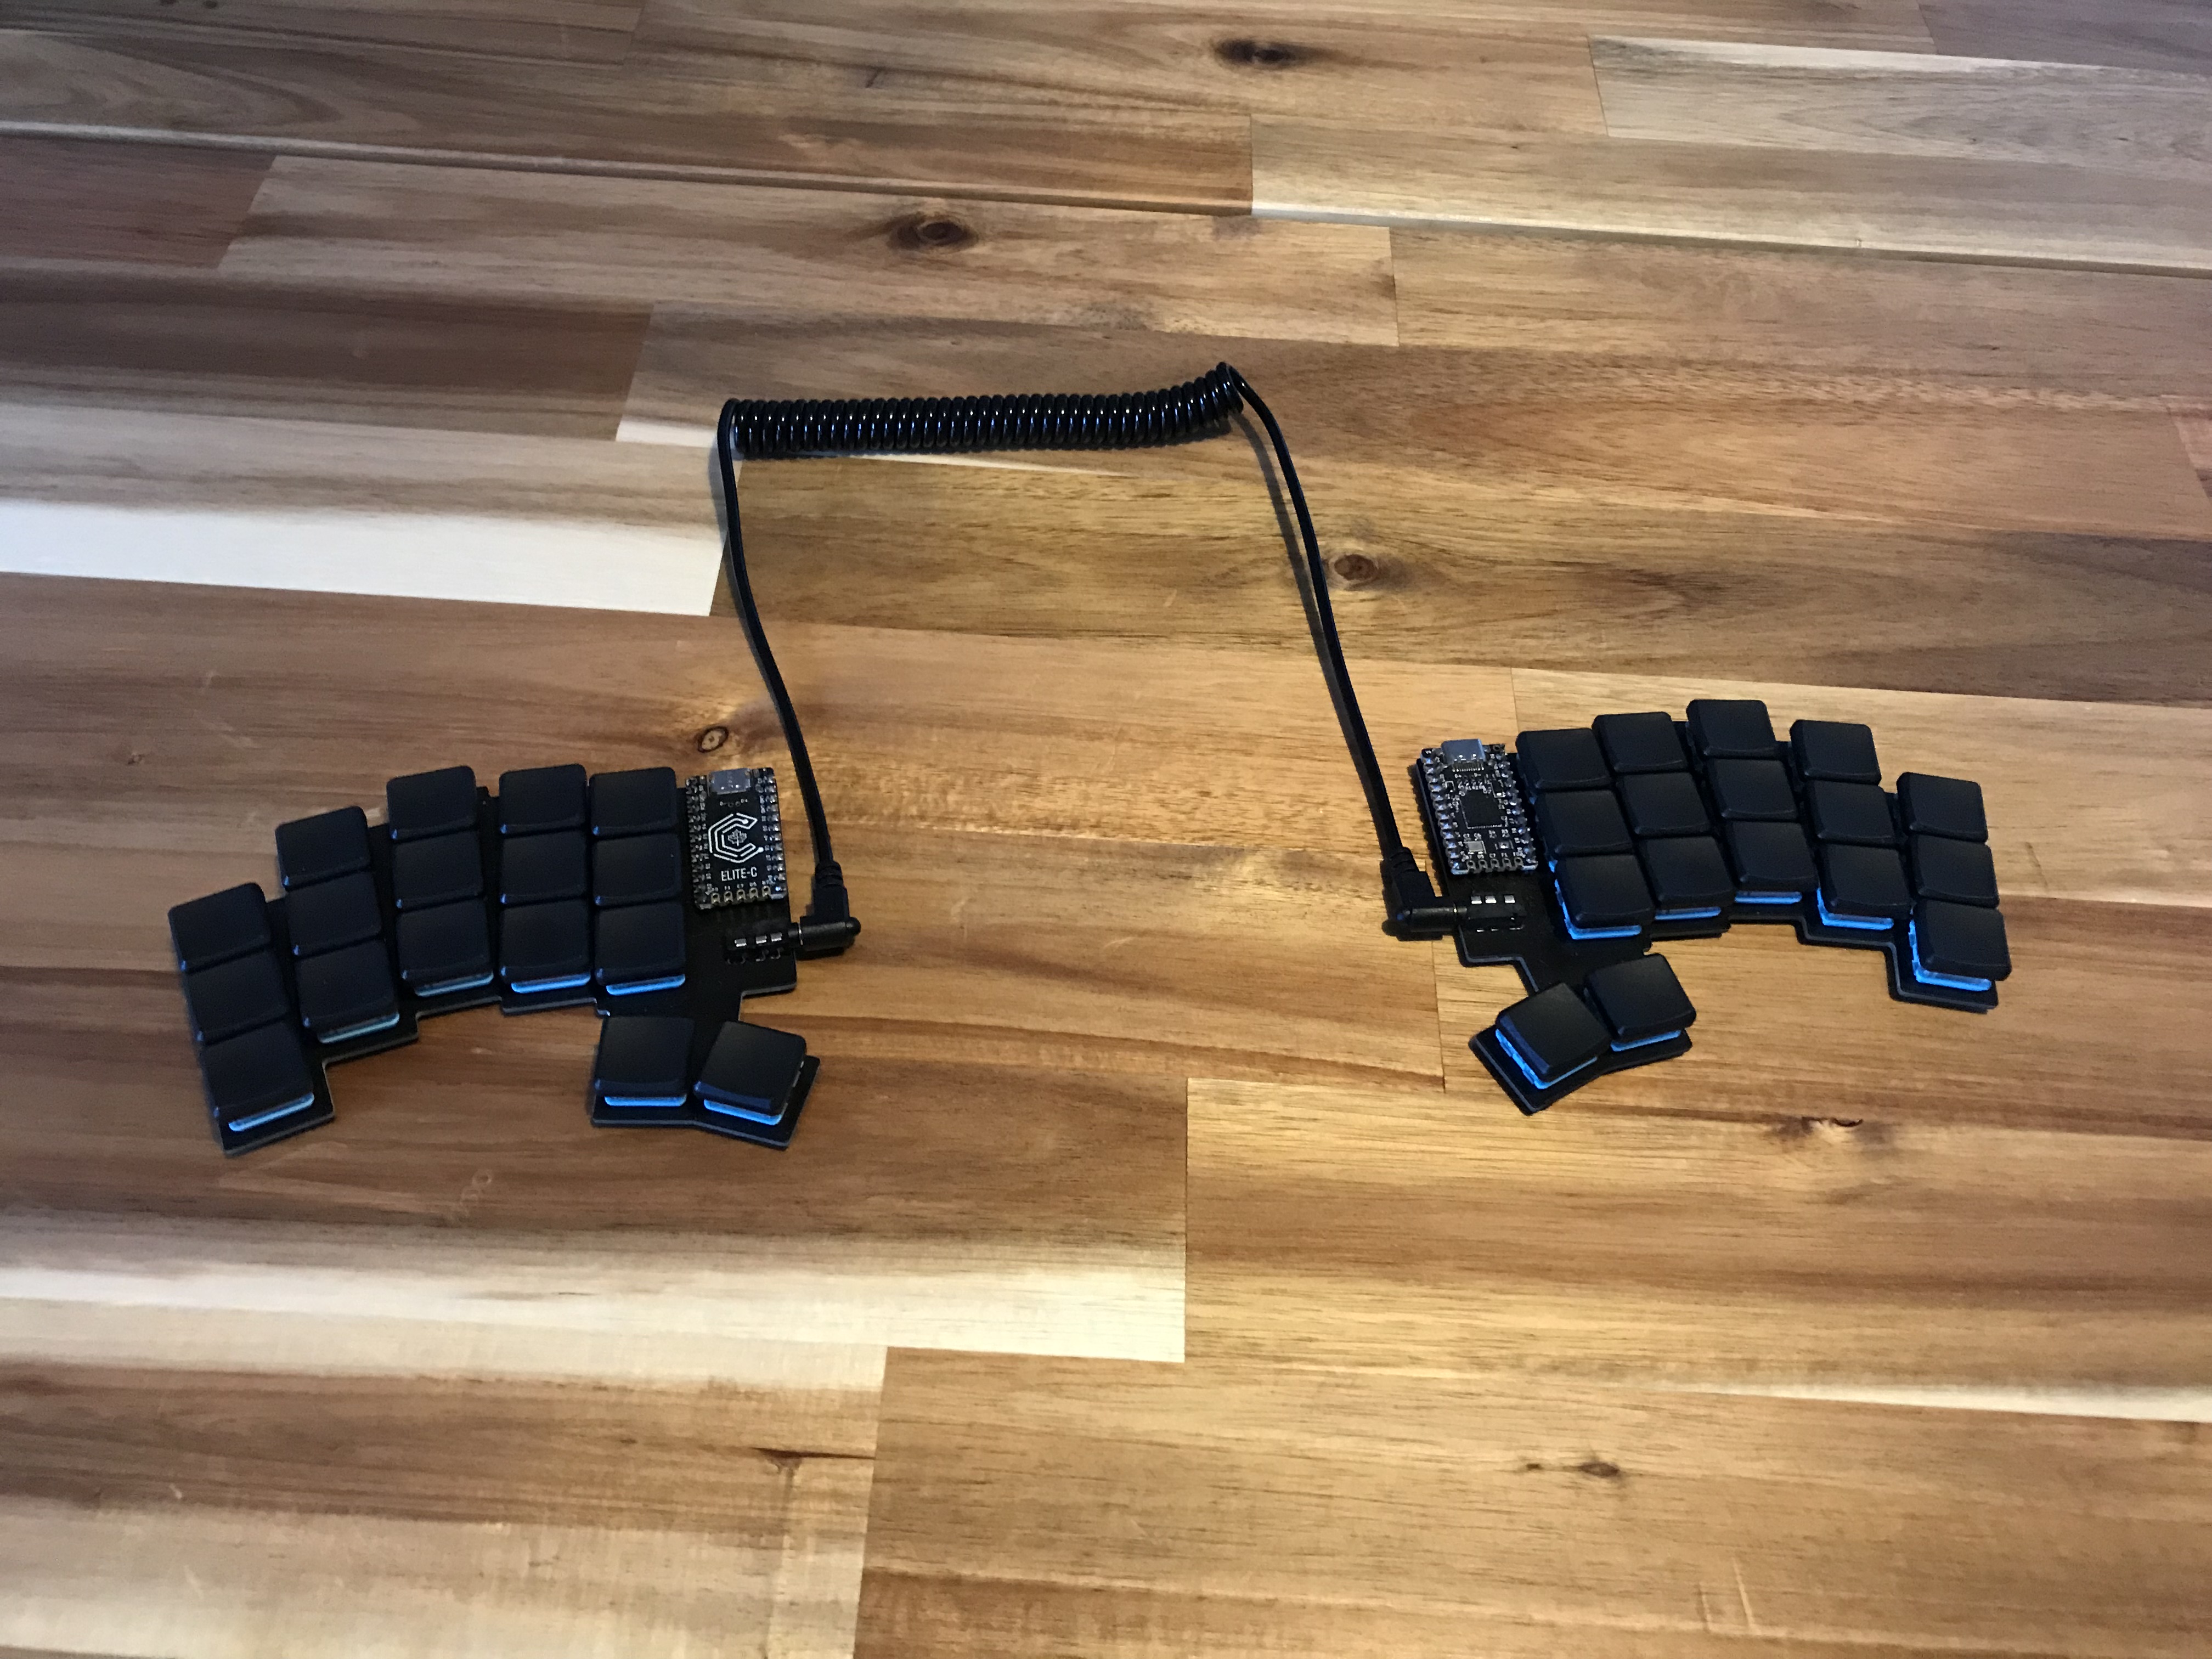
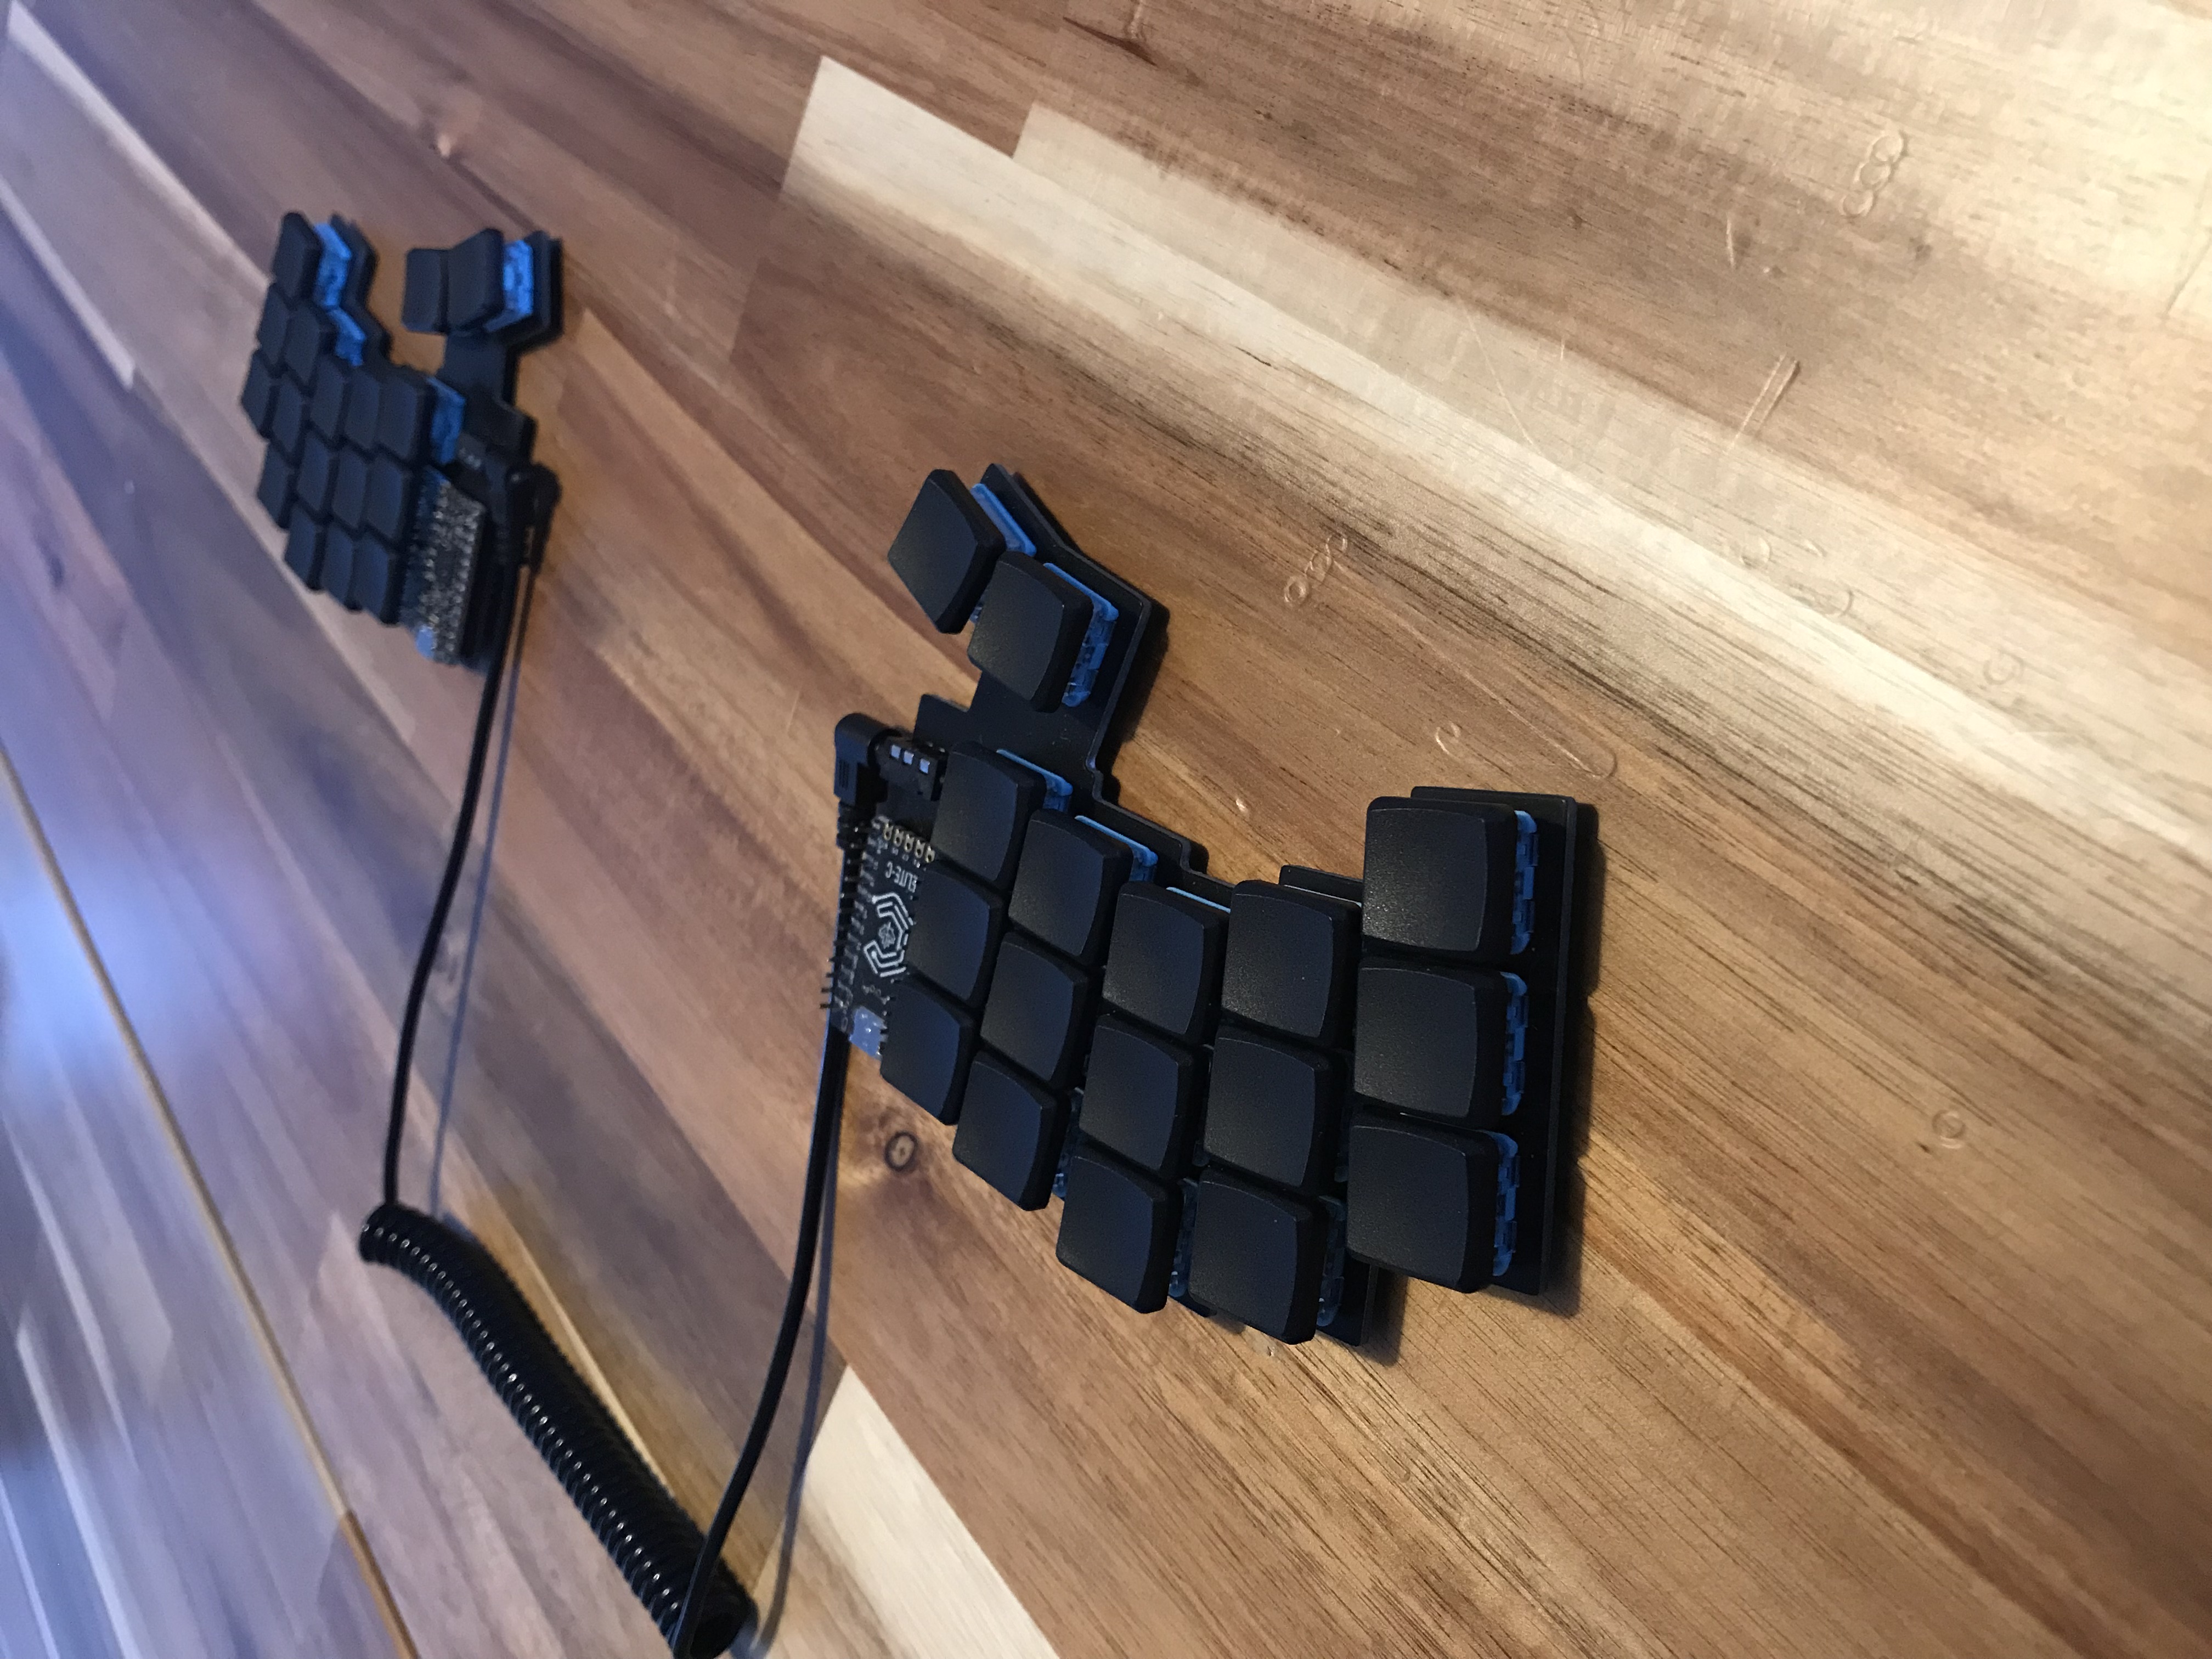
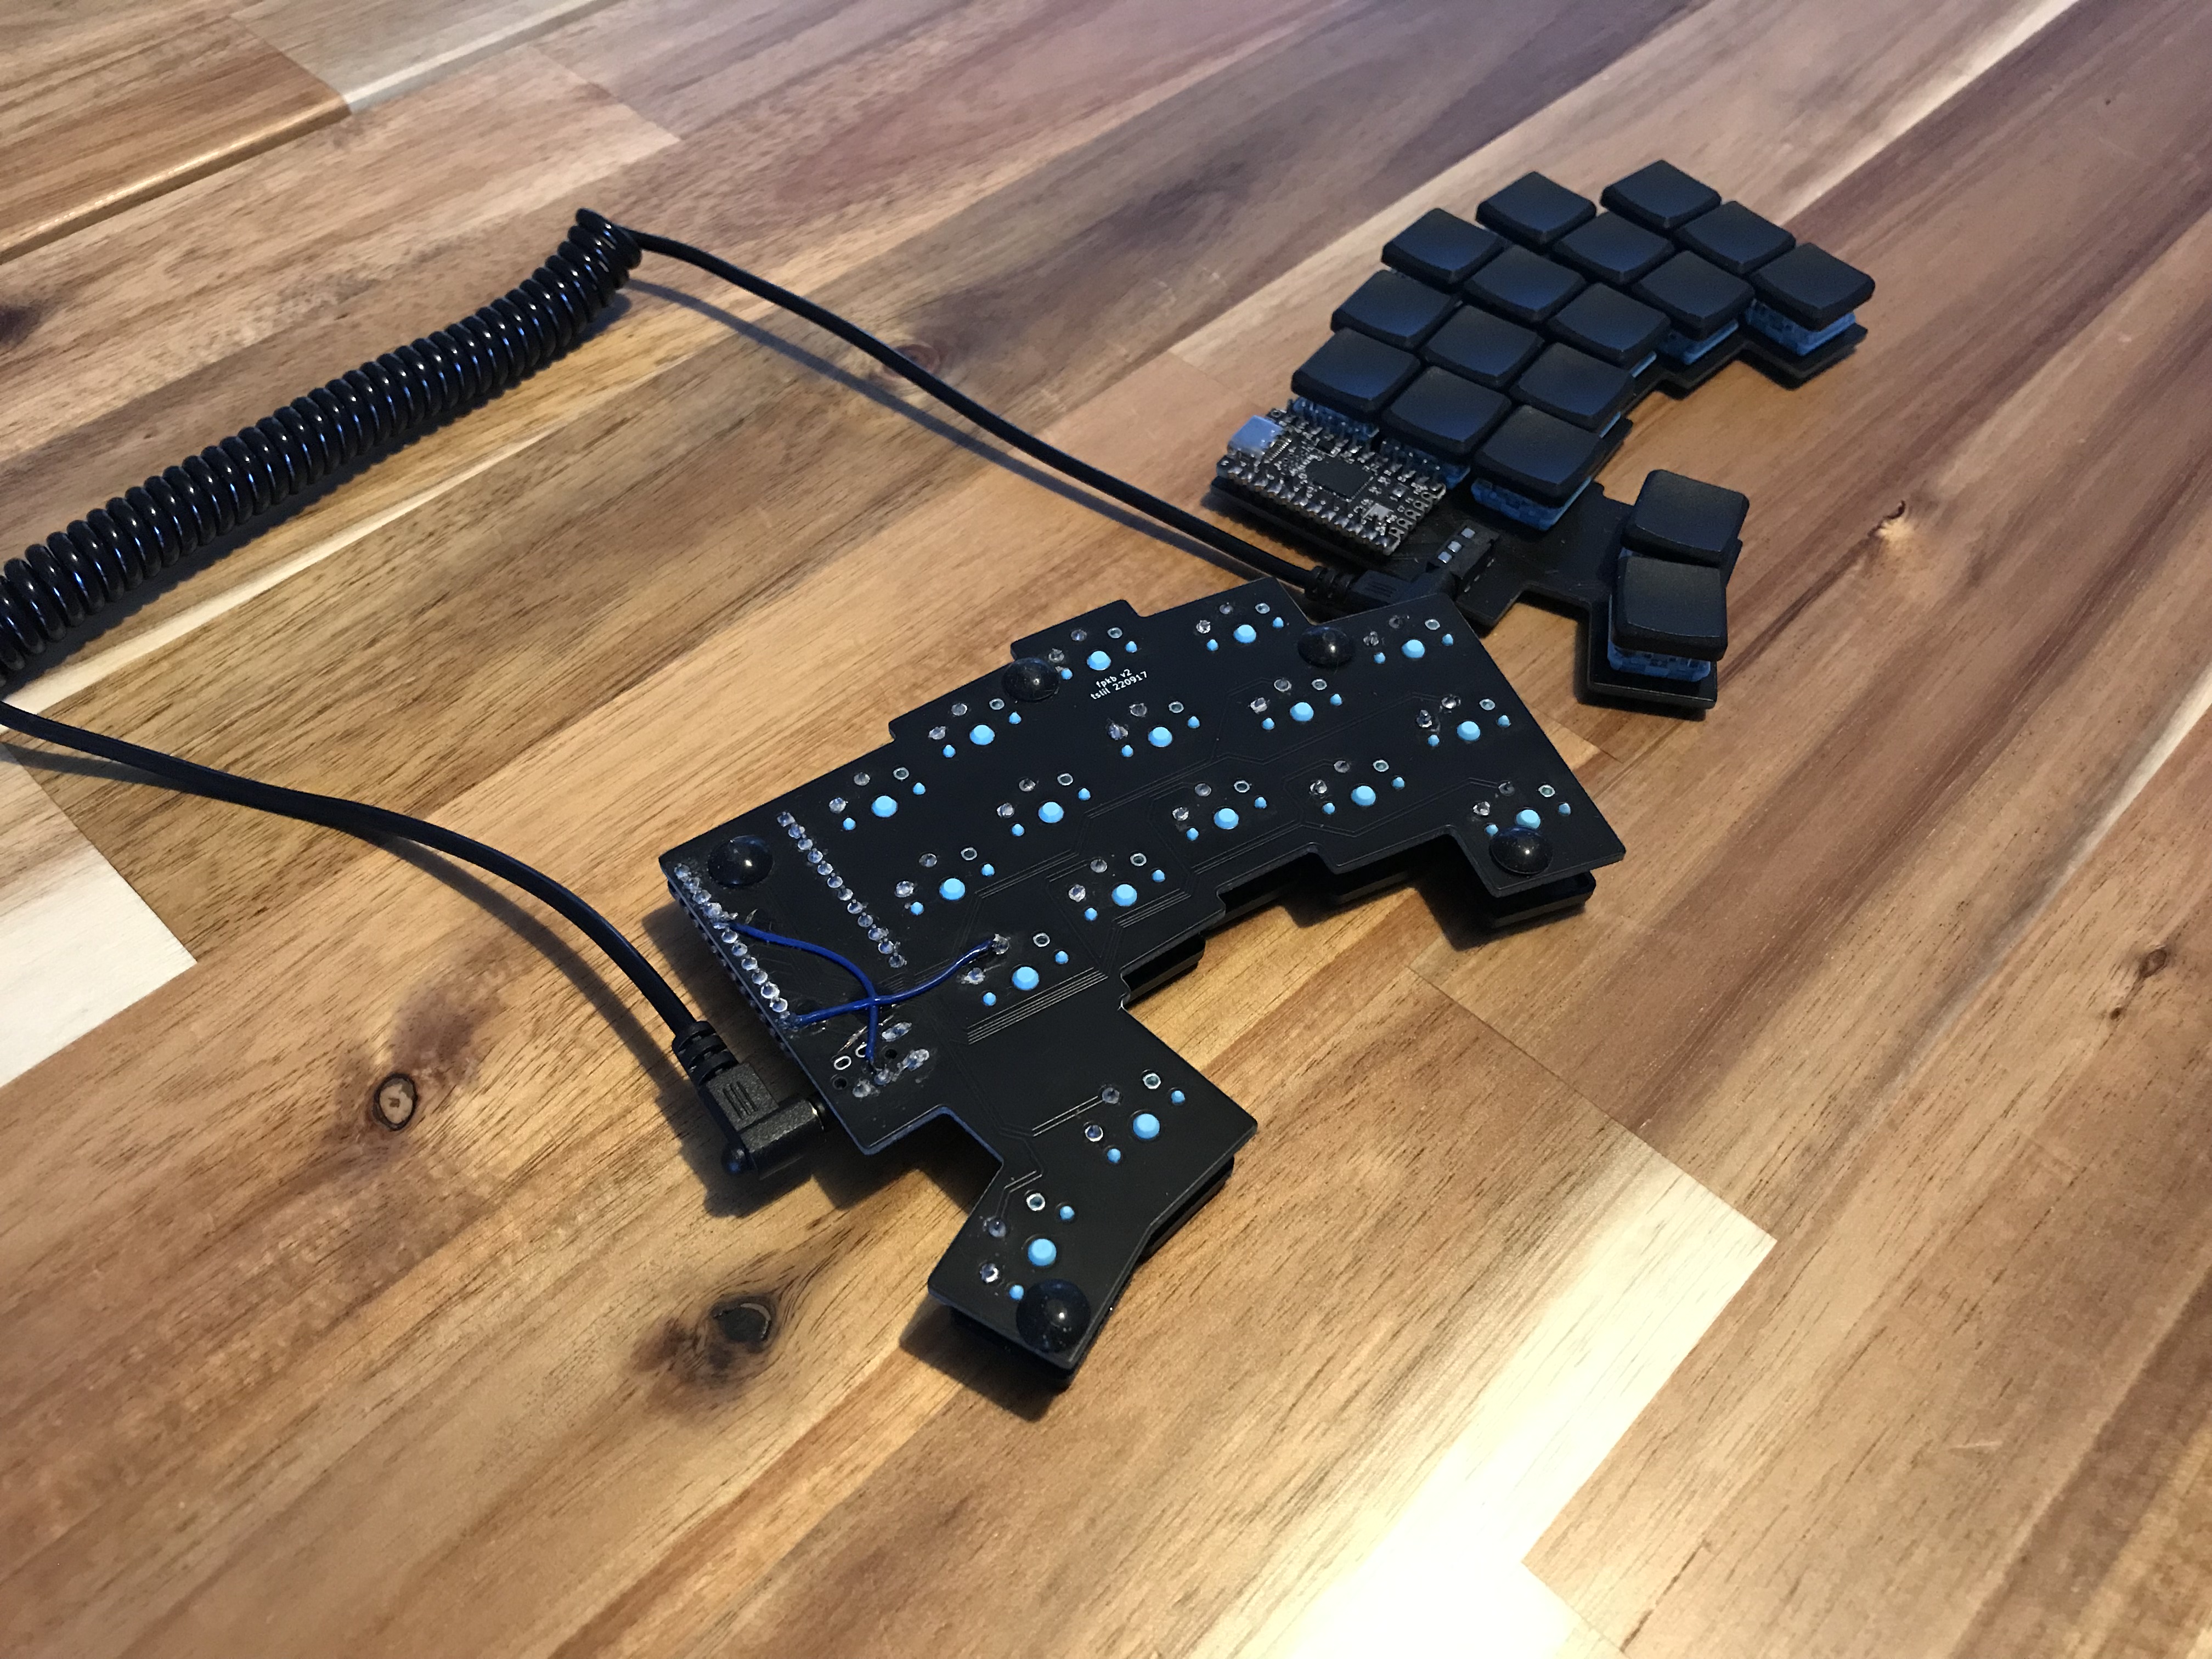
The FPKB above was very nice, but too fragile by virtue of being in a 3D printed case and having exposed, hand-wired bits on the bottom (in fact it broke several times in transit). The solution of course was to make my own PCB!
Using the wonderful Kicad as well as the capable ergogen for a starting point, i was able to have my first ever PCB manufactured—and it even worked! (sort of, had to bodge a pair of traces because of the limited pins available for soft serial)
This left me with the question: which keymap should i use to celebrate this new keyboard, and its low profile goodness? The answer turned out to be a ~1000 SLOC programme srchr, which runs genetic-algorithm-like tournaments over some parameter space to optimise keyboard layouts according to certain metrics. This in turn produced the layout VLOM.
V L O M Q  W F U H .
S R A T K  Y C E N I
X J ' D Z  G P / B ,
Details for this, including schematics and the optimisation programme, may be found here: https://git.sr.ht/~tslil/keyboard.
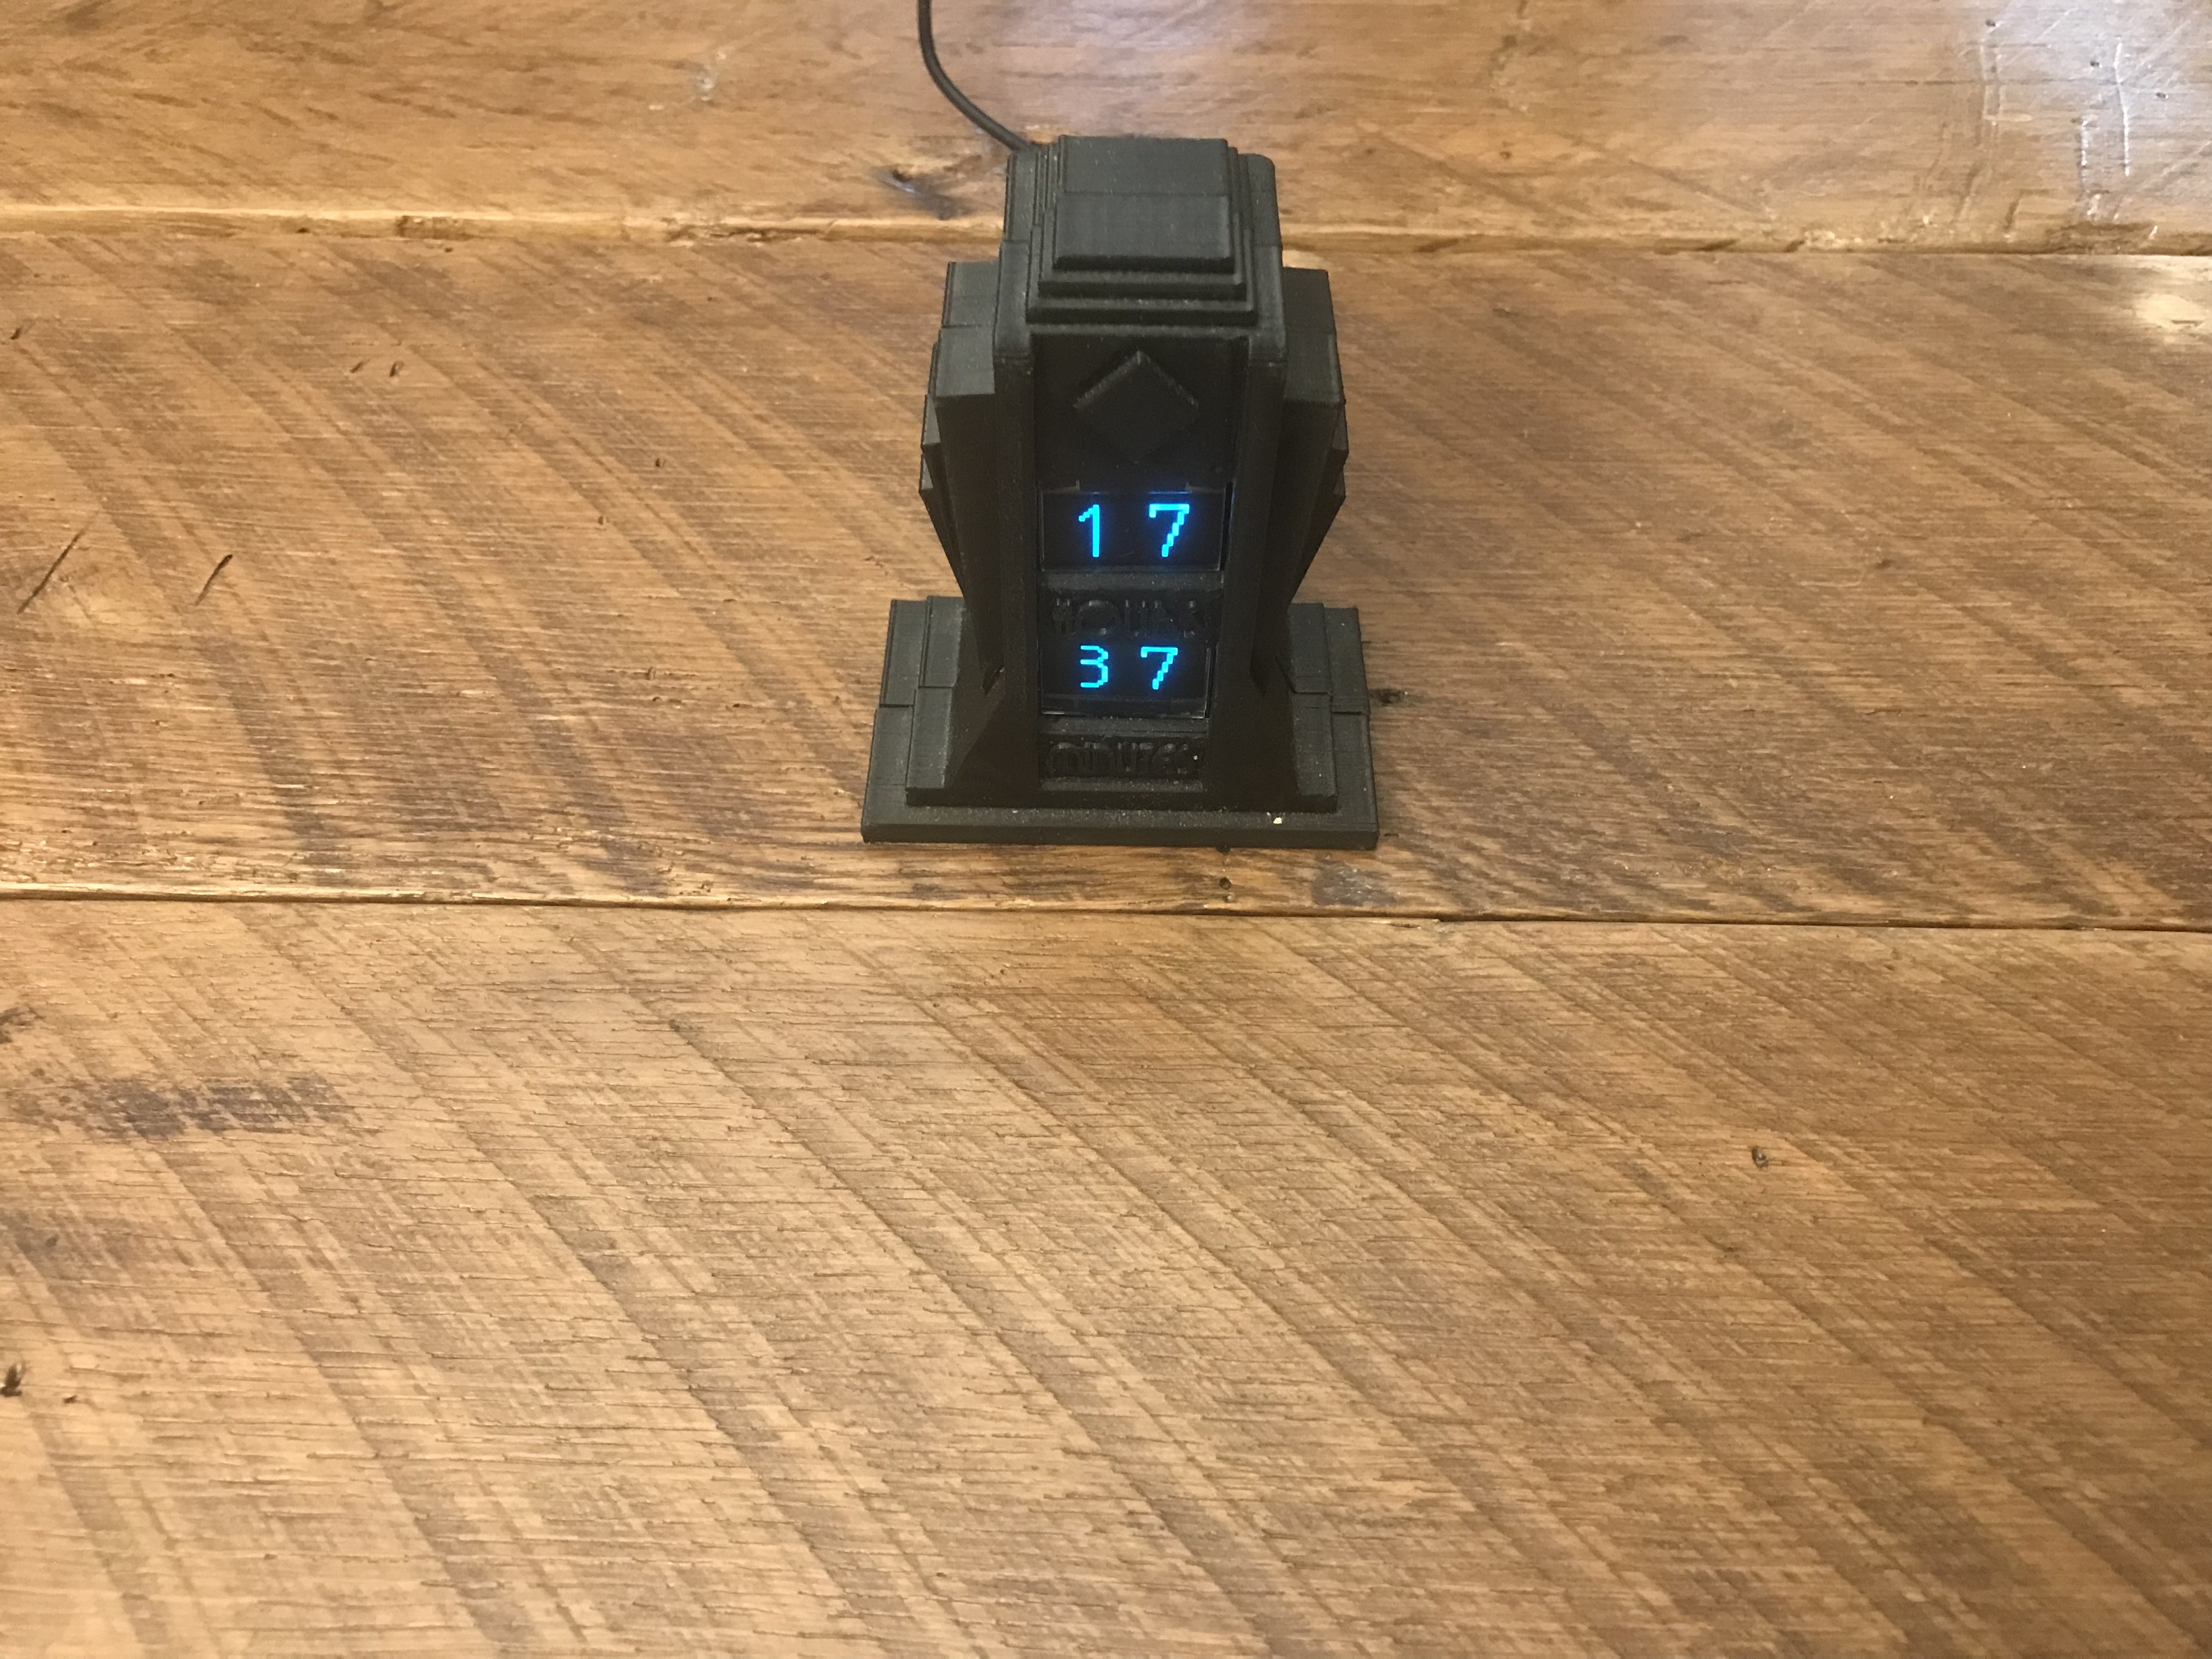
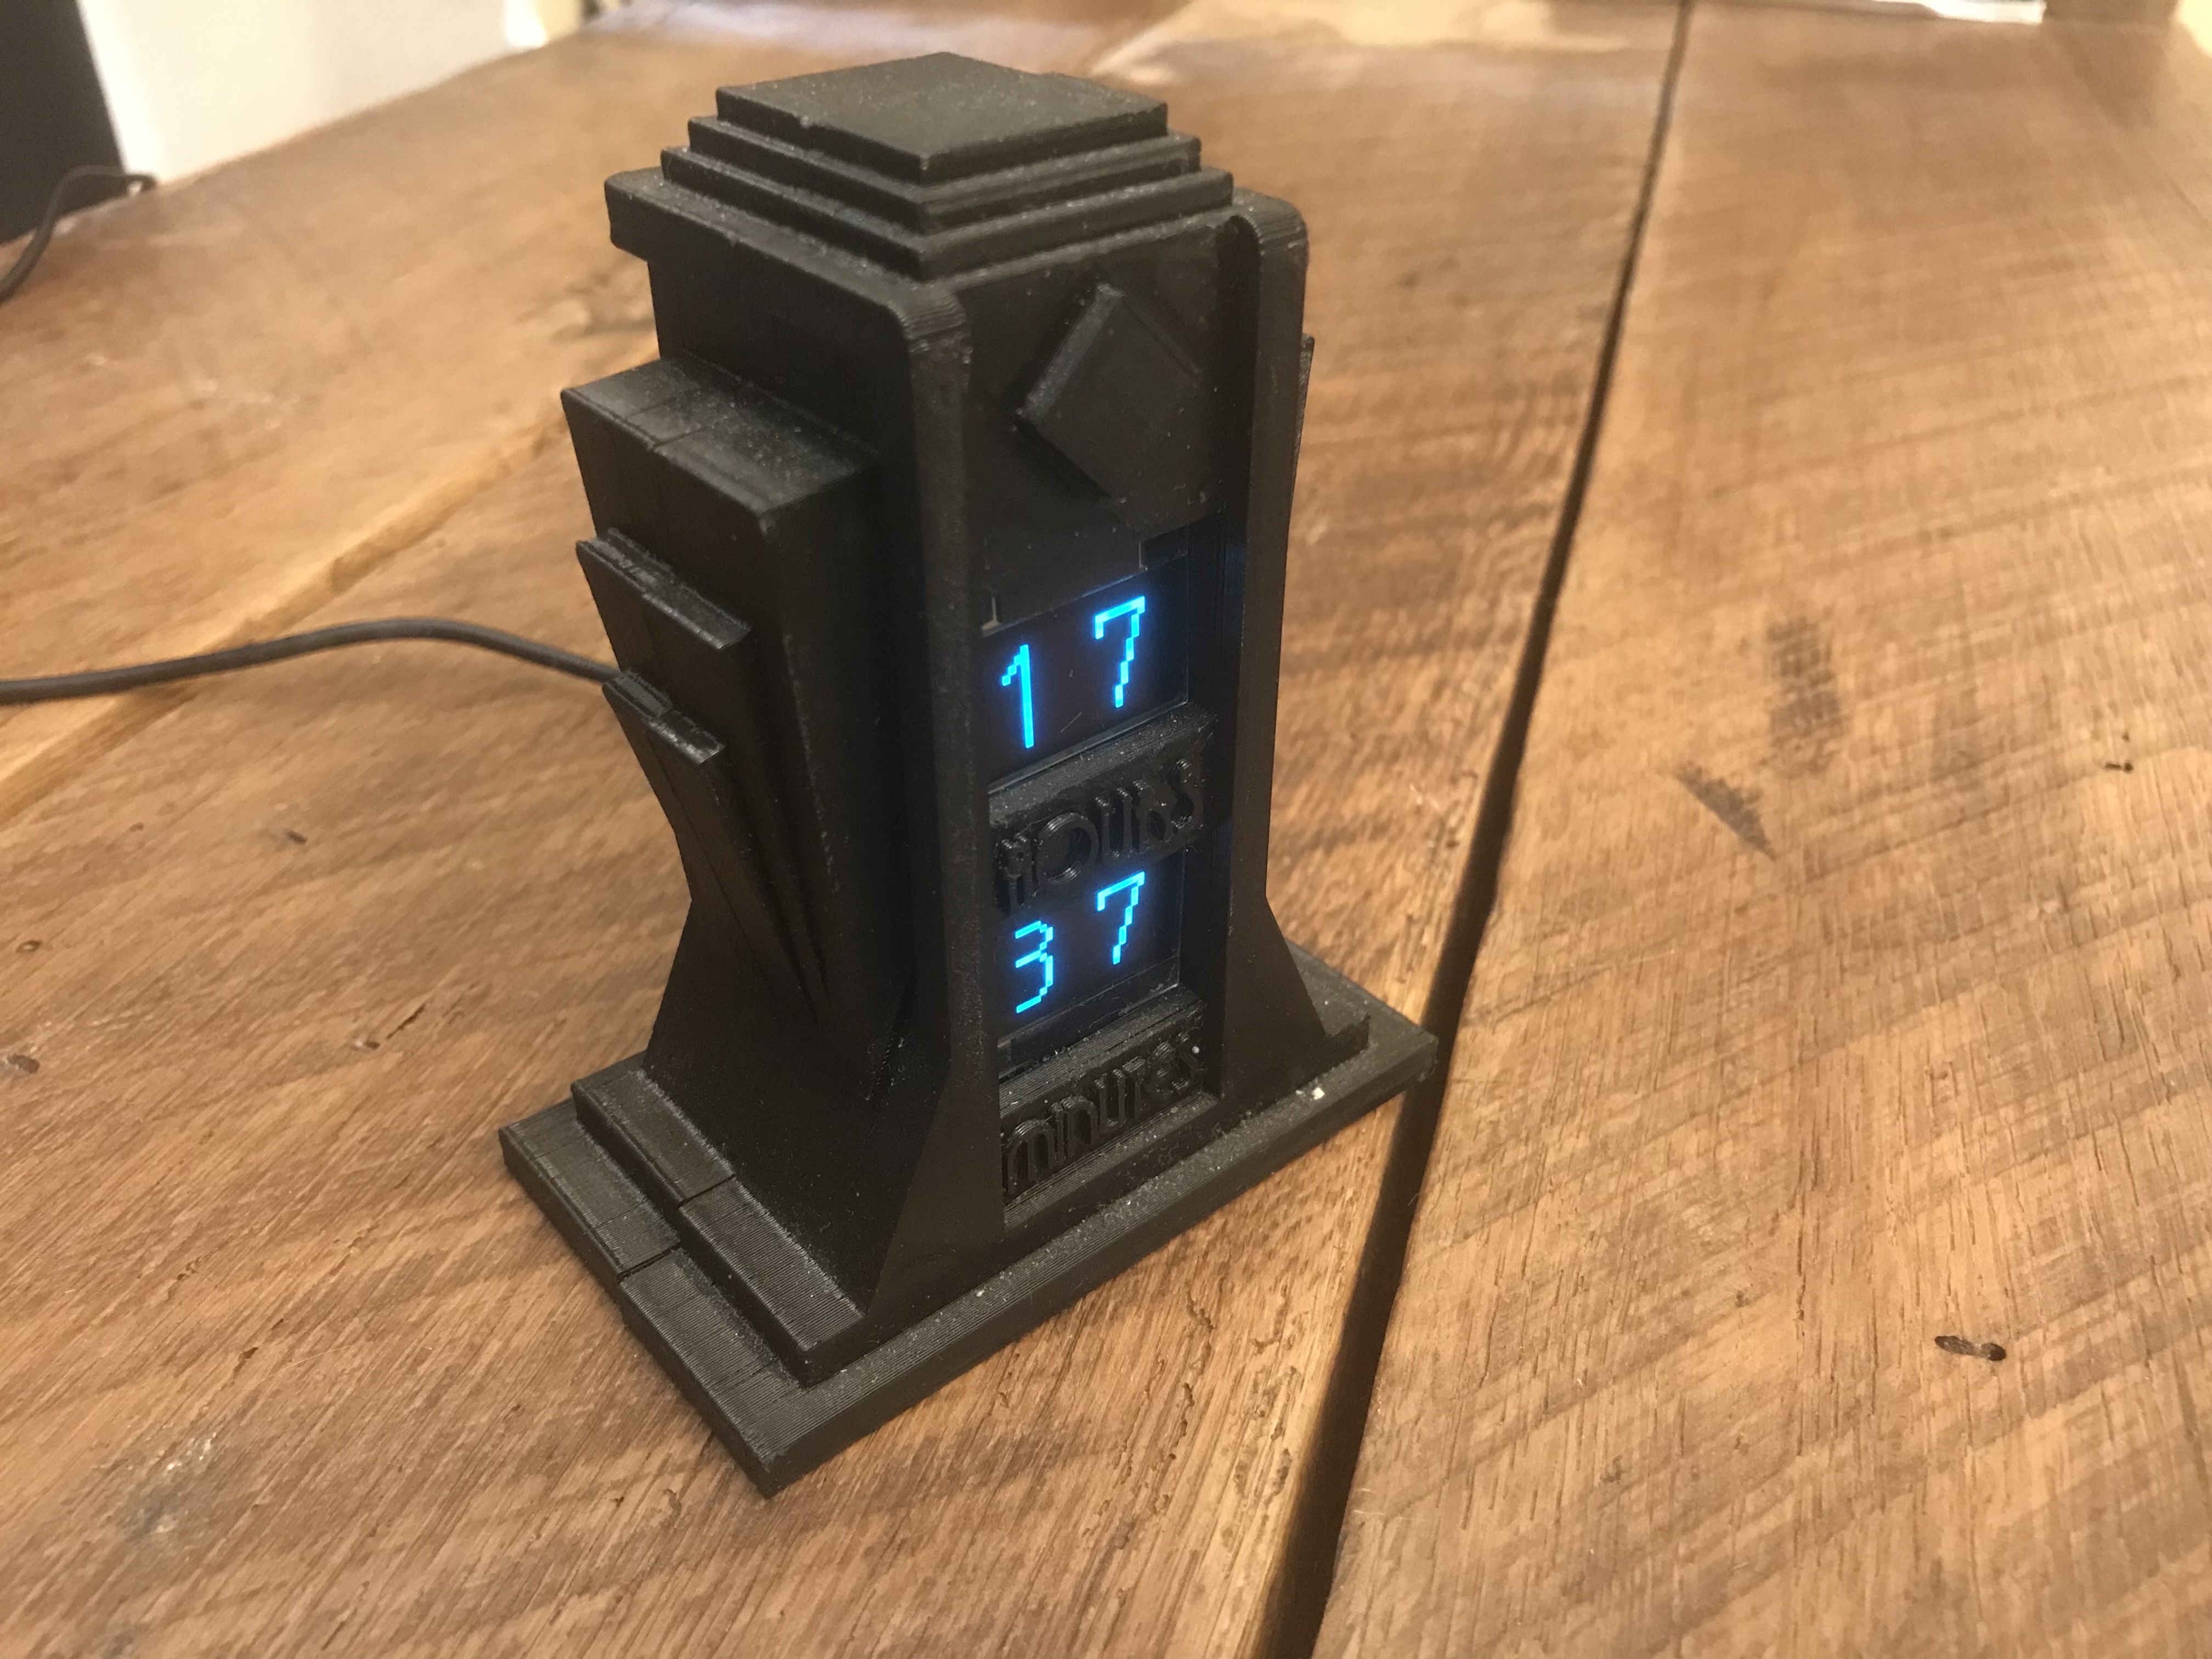
As a gift to my wife on the occasion of her ABD (“all but defence”) status during her PHD, i designed and built an art-deco bedside clock.
At its core is a naked ATTiny24 polling a coin-cell backed DS1302 RTC module, and controlling two small OLED screens – all over SPI. There are two buttons, one to increment the hour, and one to increment the minutes. The clock is powered by 5v over USB cable.
Other than the fun of designing the case, part of the fun of this project was designing the font for the digits of the clock. I used mtpaint to do pixel-art digits in the theme of art-deco, and to export them in the venerable PPM image format using a custom palette of two colours. I then used Emacs (of course) to convert the PPM files into byte sequences which i could embed in the flash memory of the MCU.